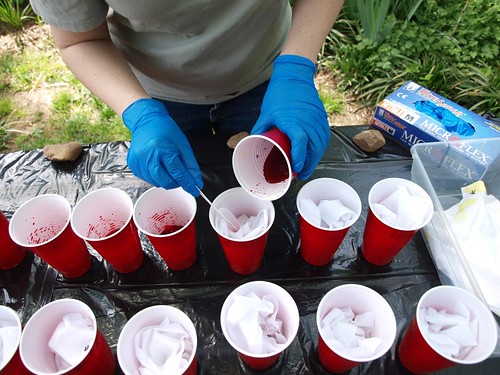
Over the weekend, Kristal convinced me to let little loose and just experiment. I used my 50% off coupon to purchase 5 yards of prepared for dye Kona cotton-- it cost me less than $20, people!-- and helped make a huge mess on Kristal's patio.
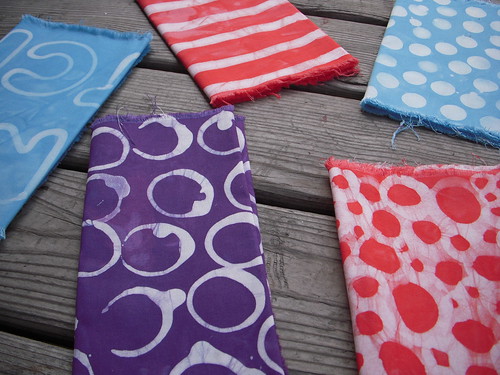
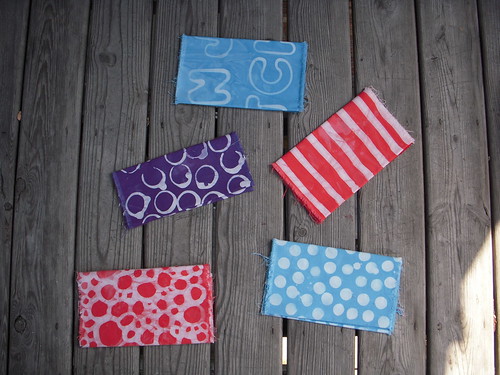
We used several tools to apply the wax, including cookie cutters, cardboard tubes, carrots, and paintbrushes of different types and sizes. First we waxed the fabric, then we dyed it. After completing the dye process, we followed Malka's directions for removing the wax (found in her fabulous book). I dyed five quarter-yard cuts of fabric.
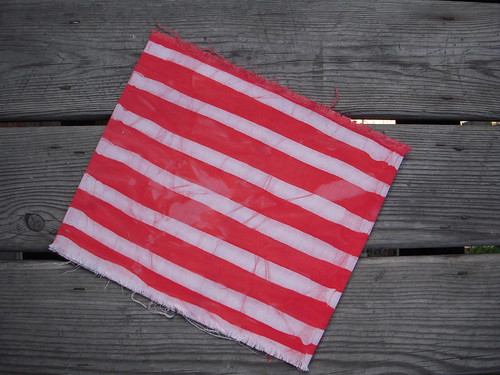
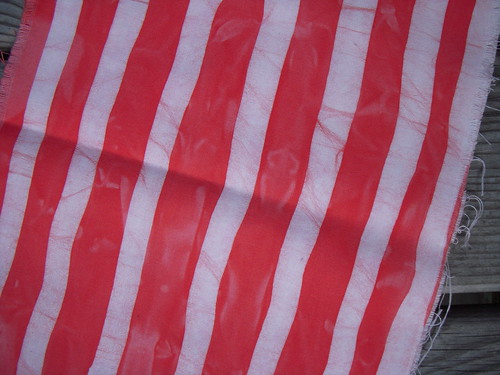
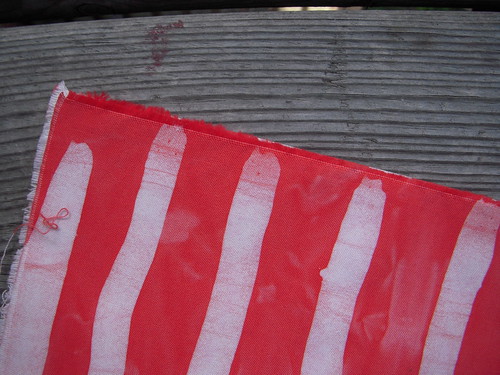
First, I created the stripes you see above. I used a large, bristled paintbrush to apply these streaks of wax. Everywhere that is white-- not really white, per se, but you get the idea-- is where I applied the wax. The bristled paintbrush holds wax well, and allowed me to apply a long streak of wax. You can see slightly where the wax overlapped. The selvedge shows where I began my streak.
The pattern and color on this piece of fabric closely resemble a big-top circus tent, therefore I have named this "print" Circus Stripes. Look closely at the photos to see the subtle variations that come with all hand-dyed fabrics. The gradations and lines that the dye left behind create a unique texture; no two pieces ever look the same.
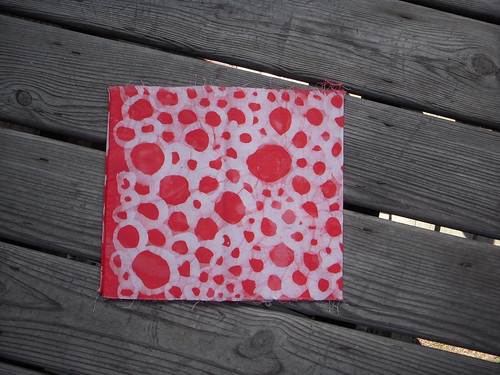
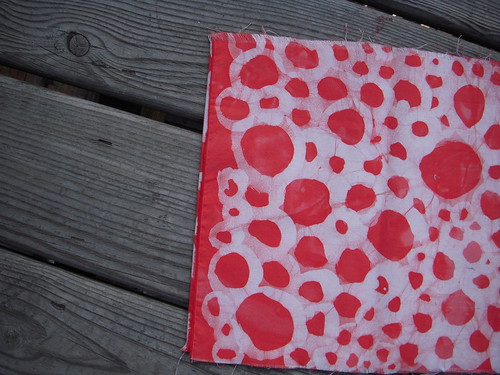
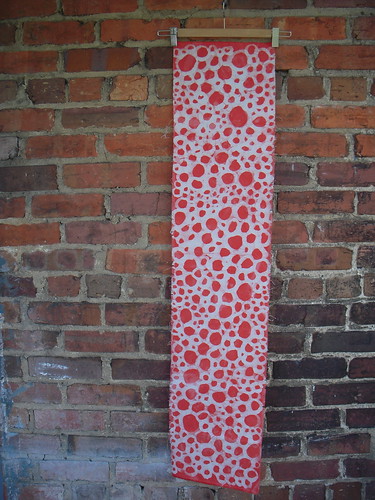
This pattern, Pebble Doodle, was created using a foam paintbrush. I painted the circles onto the fabric, one after another. It was quite time consuming, but the end result is pleasing. This piece of fabric particularly shows variations, especially where wax was not adequately applied to the fabric. Overall, this is my favorite piece; I am looking forward to recreating it in several different colors, though I know the final products will each be different.
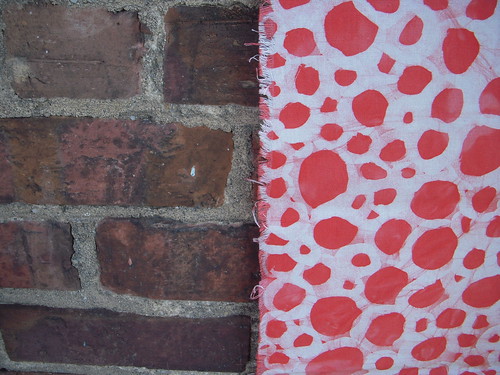
I loved the look of Pebble Doodle against the bricks of my building; brick is a beautiful pattern all its own. Perhaps I will attempt to recreate that look and texture in my next experiment.
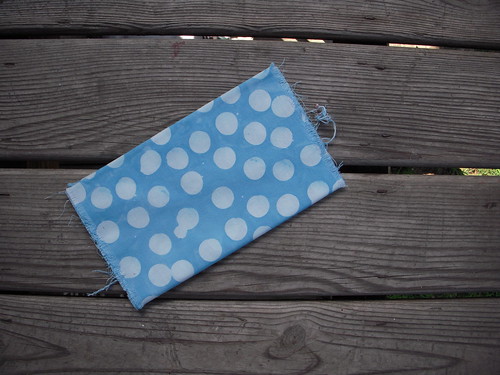

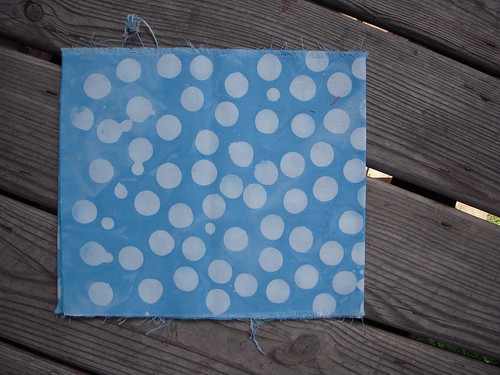
This fun dot was created using a carrot grown in Kristal's garden. After waxing about 3/4 of this piece the carrot was cooked and it began leaving orange streaks on the fabric! We used a powder called "azure" to create this color-- an appropriate name, considering the pieces dyed in that particular bath look like the exact color of a summer sky.
There are many drip dots on this piece, and although it was frustrating at the time, the end result is pleasing. I love the look of these irregular dots, and the small splashes of wax between add the character that you just don't get in printed fabric.
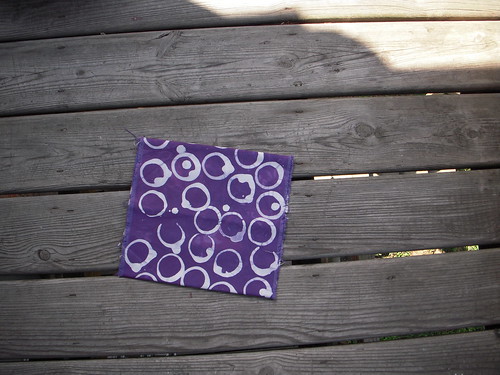
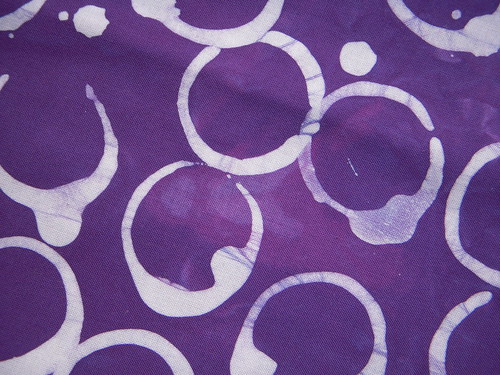
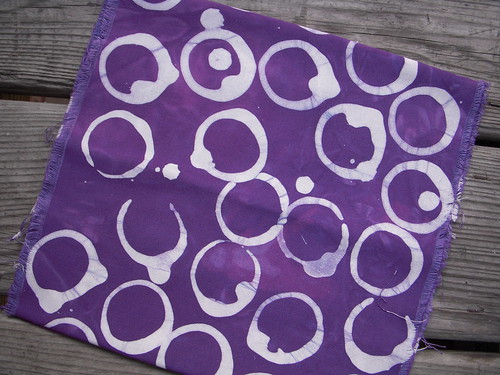
This piece gave me fits from beginning to end! I used a toilet tissue cardboard roll to stamp this pattern in an attempt to create a fabric spotted with rings. The wax foiled me, however, and dripped just about each and every time I attempted to stamp the fabric (perhaps this was due to my shaky hands).
Although it was frustrating at first, I embraced the lack of control and ended up with a beautiful piece of fabric. This color is produced using a powder called "reddish purple" and is probably my favorite color of all the dyes we used. The pattern-- called Coffee Rings-- is one that I will definitely reproduce again.
Everything did not go exactly perfect, which I struggle with. I still don't get it with the dye bath creation and color mixing, but I guess that's okay for now. Experimenting with wax and creating my own beautiful patterns on fabric was immensely satisfying, and so I guess all the knowledge and perfection can wait. I will get there eventually, and hopefully will have more successful experiments along the way.