Showing posts with label gifts. Show all posts

Friday, December 30, 2011

Name Books

You wouldn't believe it by reading the internet, but making handmade gifts for babies is difficult!  Most of what I find on the web (that's something cute and something I would actually want to or could make) is for toddlers.  So this year, I was wracking my brain, trying to think of something to make for Daniel and Nickolas (last written about here).

Then, I went shopping with my girlfriend, Karina.  We talked about soft books and Daniel's incessant desire to chew on things.  We talked about how many baby gadgets Daniel owns already.  We talked about how Karina didn't purchase any books for Christmas.  Enter my bright idea!

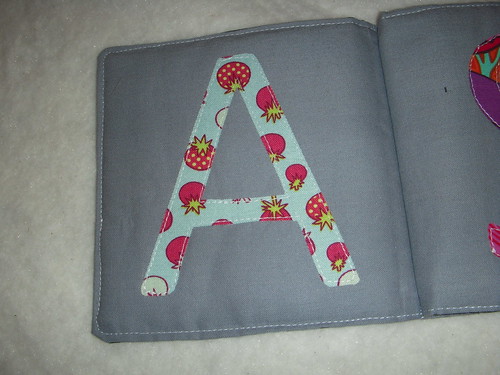
Faithful readers, I give you the name book.  This personalized book measures about 5" square and is made entirely of scraps, including some of my precious Jay McCarroll stash.  Each page is dedicated to one letter of the child's name.  I tried to choose bold, bright prints for my letters, and I'm pretty sure I was successful.

DSCN0010

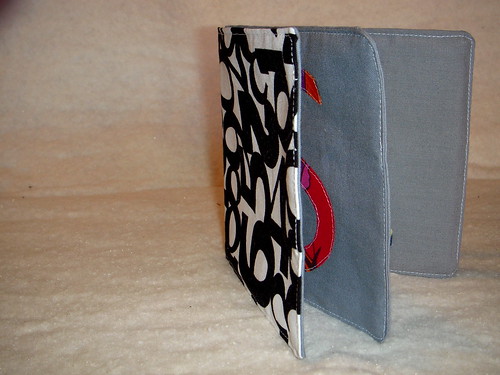
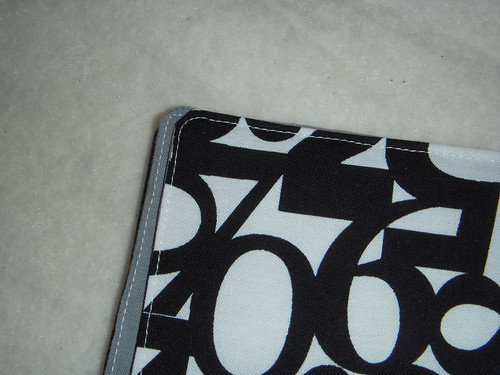
I used an iron-on adhesive in order to attach the letters to the page and top-stitched around each one for durability.  In order to keep this book truly soft and satisfyingly puffy, the pages are stuffed with fusible fleece.  Every page is neatly top-stitched.

DSCN0004

DSCN0009

These name books are based on an alphabet instruction concept commonly known to instructors of early and emergent readers.  When learning letters, it's a great idea to start with a child's own name, since those are the most interesting letters of all (it turns out that reading your own name is pretty motivating)!  Many teachers will help students create alphabet books using a child's name (and the names of their family or classmates) to help enforce alphabet recognition.

DSCN0002

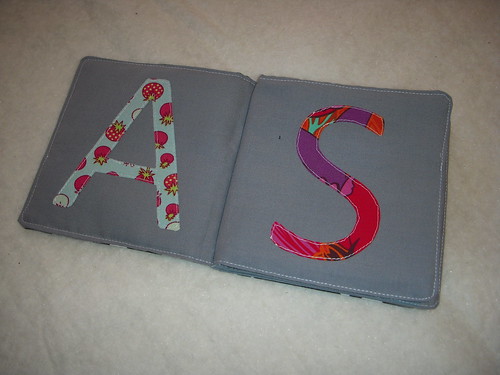
Books like this are excellent toys because not only do they enforce letter recognition, they enforce print concepts, too!  When children play with books (and when we read to them), they learn that books start with a cover, that letters are found on the page, that we read from left to right.  Although this book is a little simple, it's a great introduction to print concepts like turning pages and seeing print on a page.

Although I made a soft name book for Nickolas and Daniel both, what you see in this post is a custom product created for a client.  Okay, not a client.  Karina asked me to make one for a coworker as a Christmas gift, and I obliged (And then she obliged by paying me. Cha-ching!).

I have future plans for other soft books and am considering creating a tutorial and pattern with templates for the name book and others.  Any interest?

Monday, December 19, 2011

Drawstring Backpack

Long time, no see!  There's been lots of sewing but not a lot of blogging going on these past few months.  I'm not pressuring myself to blog, or have lots of followers, or be high-profile enough to receive a free Panasonic 360 Cordless Iron to review (like everyone else).  Instead I'm just quietly going about my business, meeting with my stitching group weekly (they're more awesome than a free cordless iron), and sewing on whatever projects I want.

Recently, my school hosted our annual holiday celebration and silent auction.  In the past, I've offered whatever fun teacher-activity the PTA asked me to do.  This year, I suggested my own donation: a sewing lesson/workshop.  The winner had two project choices: drawstring backpack or the Keyka Lou Camera Case Wristlet.

The auction was won by the super-sweet Abigail, daughter of an awesome colleague.  She chose to work on a drawstring backpack and insisted that the bag include a zippered pocket-- cue Noodle Head's drawstring backpack tutorial (thanks, Amy!).

This tutorial is great!  I'm not a bag-sewer and three-dimensional objects are often out of my league.  I had to read through it a couple of times to get comfortable with the process, but once I started working it was smooth sailing.  Although it took me a minute to get comfortable sewing in 3D, this tutorial is simple and straightforward, and easy enough to make with a beginning sewer.  And the bag is cute!  And lined!  And has a fully finished zipper pocket!  To me, this is all very impressive; it doesn't seem like any of that should be easy, but it was.

After I made my practice bag, I invited Abigail over for an afternoon of sewing.  She loves purple, so I pulled a gorgeous purple Alexander Henry print from my stash.  Instead of using cording for the drawstrings, I purchased some pre-made double-fold bias tape in a coordinating color.  Before she arrived I cut the fabric pieces needed for construction and prepared the zippered pocket portion (for the sake of simplicity).  I also marked seam lines along each piece for Abigail to follow as she sewed.


Abigail was very excited to sew and got the hang of operating the machine right away.  We sewed several lines on scraps to practice guiding the fabric without pushing or pulling, and then began construction on the bag itself.  She did a fabulous job!  Clearly, this chick is a natural.  Her bag turned out pretty much perfect, despite some mistakes made by (and fixed by!) yours truly.


I've got to say: I'm extremely proud of this bag.  Not only was I able to successfully create a bag, but I was able to successfully help an 8-year old do it!  I feel extremely accomplished and I know Abigail does, too.  She even asked if we could sew together again!

Thursday, October 27, 2011

God, Country, Notre Dame

Long time, no see.  Mostly, I'm busy.  Also, I couldn't post about this until very recently!


Christopher and Lauren finally tied the knot, and I was able to give them their t-shirt quilt!  It was a big hit (Thank God!) and it was even halfway a surprise!  As usual, my favorite longarm quilter at Kept in Stitches Quilting did a fabulous job.

Sadly, I didn't get a picture of the back.  Solid blue, with a strip of gold across the middle.  In the gold section I had several ND logos taken from the sleeves of the t-shirts.  Very cool looking, I promise.

My apologies to the bride for the above photo.  Laser eyes look pretty good on her, though.

Sunday, May 15, 2011

Hokie Pokey

For my entry in the Spring 2011 Bloggers' Quilt Festival I am revealing my latest creation, Hokie Pokey.  It is my second ever t-shirt quilt, made for Josh's brother, Tyler, as a graduation gift.  Obviously, he graduated from Virginia Tech's College of Natural Resources & Environment with a major in Fisheries Science.  Pretty cool, right?

DSCN0973

To create this quilt I used t-shirts and fabric provided by my mother-in-law to be.  There were about 10 tees total, and I was able to use the front and back of only a few of the shirts.

DSCN0974

This quilt measures 54"x88"-- I'm calling that "skinny twin."  I would have loved to make this quilt larger, but the number of t-shirts dictated the size and shape of the quilt.  I chose a 3x5 layout so that Tyler could easily use this quilt to lounge on the couch in his post graduation days.  All but one of the shirts were used in the top; the last t-shirt was saved and used for the pieced backing.

DSCN0976

Altogether this project took about 15 hours to complete, counting time spent finishing the binding.  It took two hours to prepare and cut the t-shirt blocks, six hours to piece the top (including cutting of sashing), and two hours to prepare the backing.  Attaching and finishing binding took five hours across various sessions. Yes, I kept track.

DSCN0975

With this being my second finished t-shirt quilt, I have some tips to share.  Forge on, fearless readers, for my enlightened wisdom.

1. Fusible stabilizer smells terrible when ironed, but it is completely necessary.  I suggest that people cut the shirts, stabilize them, and then trim them down to the desired size.  My iron did not slide easily across the stabilizer; when I tried to iron everything stretched and stuck to the plate of my iron.  Therefore, it is essential to press, not iron.

2.  The t-shirt blocks will stretch anyway.  Handle with care.

3.  Piece using a walking foot.  This is necessary considering Tip #2 from above.  The walking foot, combined with the stabilizer, really minimized any stretching that I experienced.

4.  Steam causes the stabilizer to unfuse.  Don't steam, even though that makes it impossible to press the seams into submission.

5.  Pinning is essential.  I am not a pinner by any means, but I did so for this project and it made a huge difference.  Though it took more time, this quilt came together much more easily and nicely.

6.  Your seams will pretty much go whichever way they feel like.  Do not try to control them.  I always pressed seams away from the jersey fabric and toward the cotton sashing; this helped to better tame the seams.

7.  Try not to let your hot iron touch the screen print on the front of the t-shirts-- the ink will smear across the fabric.  Never fear!  If this happens, rub the smudge with the tip of your iron.  You will be burning/wiping the smear away.  I don't know what to do about the smear on your iron plate; don't ask me.

8.  You can't quilt this thing yourself.  Don't even try.  My longarm quilter is the best!

Sunday, April 3, 2011

Rainbow Baby Quilt

photo-2

The photo above shows Nickolas chilling out maxing relaxing all cool on the quilt I made for him recently. Is he not the cutest almost-nephew baby you've ever seen?

I made this quilt using the block that Solidia chose for her month in The Incredible Shrinking Quilters' Bee.  I have no idea where that block pattern came from, but when I saw this I knew I had to use that block to make a baby quilt.

I'm especially proud because I made not one but two quilts like this, and almost all of the materials came from my stash.  I had to purchase one or two pink prints and about four orange prints.  Kristal gave me a few black and white prints from her stash.  I pieced the batting out of scraps and made backing and binding from several yards of fabric I had in my closet.  I did, however, buy some nice thread for quilting.

Overall, I'd call the project a success.  Cute!

DSCN0970

Sunday, December 19, 2010

Baby Crafts

I finished a few projects today, just in time for Christmas!  First was a set of cushion covers for my aunt.  They turned out beautiful, but I'm waiting until they arrive to show pictures.  This is mostly due to the fact that I didn't take any myself; instead I'm going to let my uncle do it.  He is an illustrious photographer with many talents, one of which is capturing action shots of furniture.  For now, feast your eyes on these cute packages!

DSCN0749

The bows are fabric strips cut from the same material I used for the covers.  Look at that perfect bow.

DSCN0751

Also completed today are some baby toys I for Nickolas-- the baby of my fiance's cousin.  No relation to me, right?  Oh well!  I have claimed this baby to love and spoil, nonetheless.  It will be handmade toys until he's old enough to read, and then I'll load him up on books.

DSCN0744

I made this adorable puzzle ball [mostly] from the instructions in Joelle Hoverson's Last Minute Patchwork + Quilted Gifts.  I say mostly because that book is heavy on text and light on pictures.  I had to rely heavily on intuition, and even got help from the local quilt shop.

DSCN0745

The ball itself is only about as big as a tape dispenser.  Excellent for little hands to grasp (and then shove directly into mouth).  This project only took about 5 hours to complete, though I didn't work on it all in one session.  It was very easy to piece-- I used the machine for most of it and finished by hand.  Oh, and for the record: you don't need a fancy stuffing fork.  A chopstick works just fine.

DSCN0747

I also made Nickolas a cute little fabric ball with a rattle inside.  I stuffed the ball mostly with filling, and then inserted a cat toy similar to this one.  Then I finished stuffing and closed up the opening with a [very ugly] ladder stitch.

DSCN0748

Now I have finished all my wrapping, including my fiance's stocking stuffers and the gifts he got for his secret santa.  I'm feeling pretty good about Christmas!  In fact, compared to many, I think I'm ahead of the game!

Friday, April 9, 2010

Engaged!


Originally uploaded by jenamoured


Don't be fooled by the rocks that I got, I'm still (I'm still) Jenny from the block.

Saturday, February 13, 2010

Valentines!

I decided to stitch up some Valentines for my sisters.  These photos were taken after the embroideries had already been framed.  Each valentine has a combination of embroidery and bead embroidery.

DSC_6797

DSC_6801

DSC_6802