Showing posts with label finished objects. Show all posts

Monday, January 16, 2012

Alpha Xi Delta

Pictured here is a commissioned quilt comprised of many Alpha Xi Delta tshirts, all from the University of New Hampshire chapter.  Leah, the recipient, and asked only that the purple tshirt be featured in some special way.  She also relayed that she is currently into gray.  Beyond that, I was given free reign.

DSCN0016

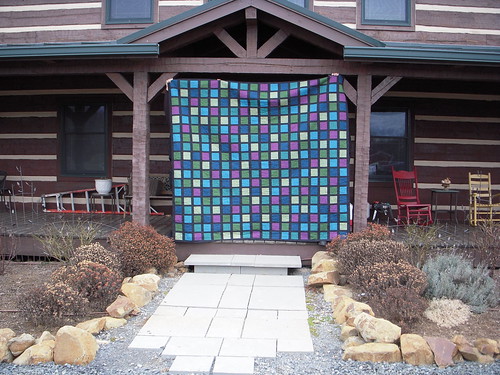
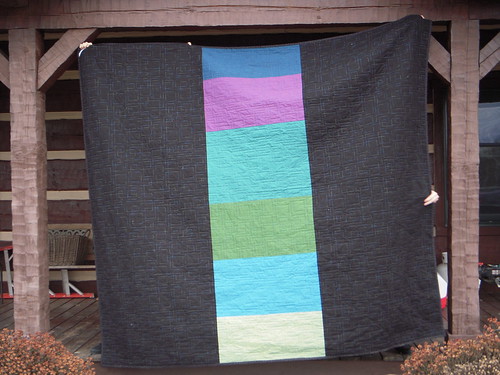
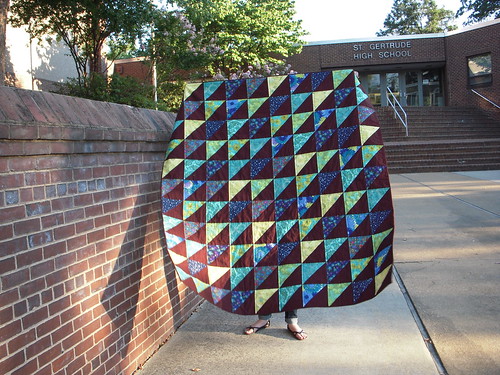
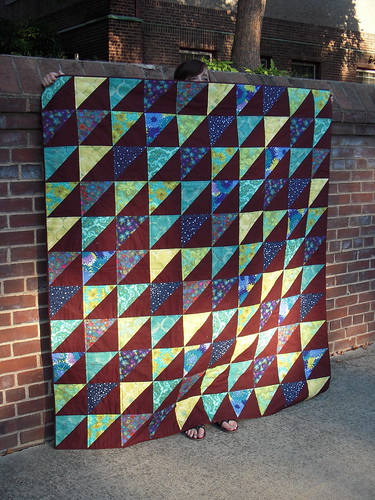
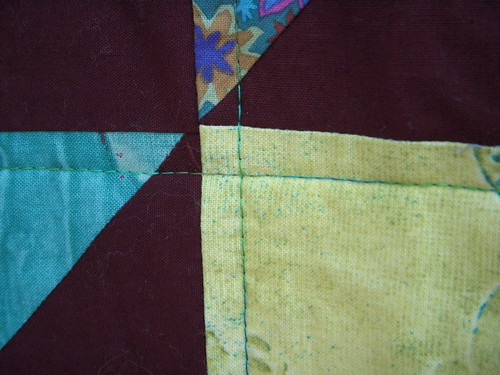
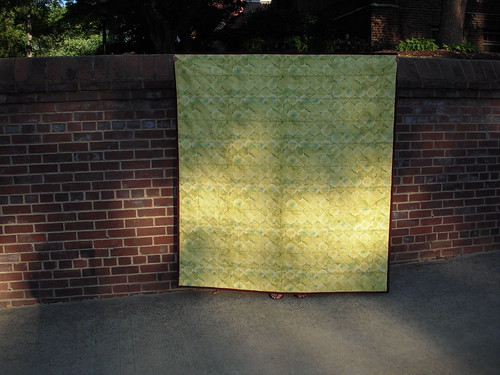
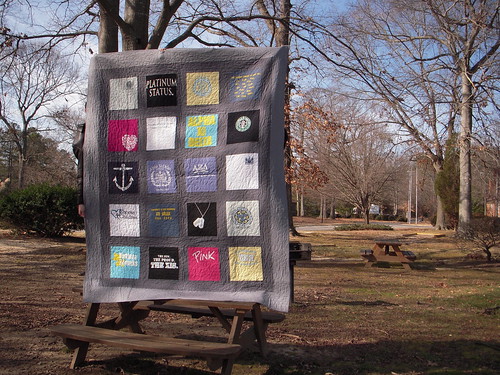
The finished quilt measures 79" x 95" (somewhere between full and queen) and is quilted with a large meander pattern in a gray thread called oyster shell.  As usual, the quilting is done by Rebekah of Kept in Stitches Quilting.  As usual, I can not speak highly enough of her customer service and skill.

DSCN0018

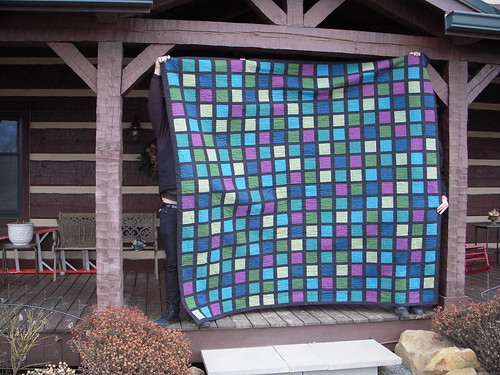
I elected to use two grays, darker for the sashing and lighter for the border.  They are both Kona cottons, but I did not note the specific colors.  The darker gray is the same gray I always buy-- it is so luscious-- and the lighter gray seemed a good complement.  Because of the extremely bright sunlight and shadows, the colors look more purple than in actuality.  Trust me, though-- they are just gray.

DSCN0020

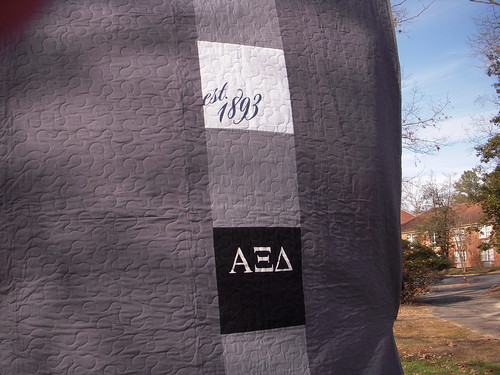
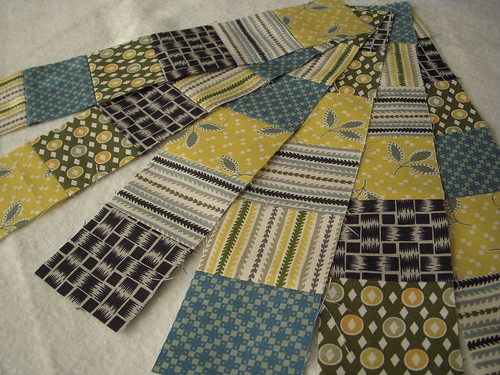
On the back I have placed two of the tshirts, as I usually do.  I like these on the back because they sort of brand the quilt.  Sadly, I forgot to put on one of my labels!  Leah promised that she would tell all her friends and admirers that this creation came from me, so I'm satisfied with that.

DSCN0019

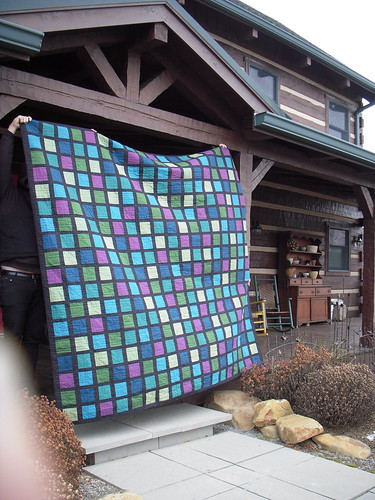
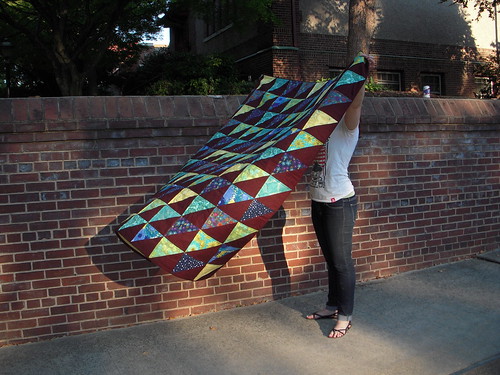
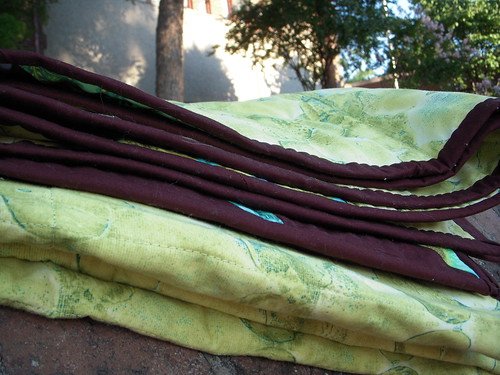
From start to finish this quilt took me 21 hours to complete.  Seven of those hours were spent on attaching and hand finishing the binding.  I'm told that's too long, but I'm not sure I agree; 348 inches is quite a lot of binding to hand stitch!

I think Leah will be delighted.  The solid gray fabrics pull the tshirts nicely together, the quilting is immaculate, and the finished product looks fabulous.  Though Leah was expecting a much smaller quilt, I elected to make a large quilt for several reasons, chief among them that I think small quilts are somewhat pointless.

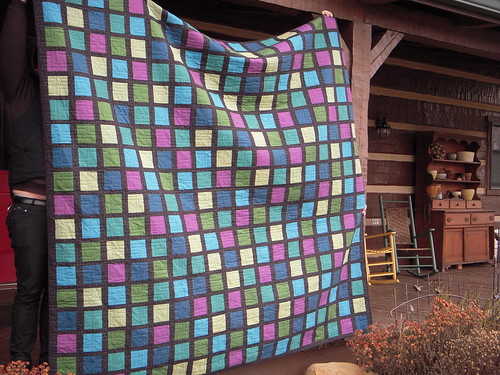
(Please note that I used a heavier interfacing for this quilt.  I have previously used Pellon sheerweight fusible interfacing; this time I used Pellon lightweight fusible interfacing.  I noticed a slight difference in the effectiveness, but not much.  The glue still didn't stick as well as I'd like.  However, the lightweight interfacing makes this nice and heavy-- good for New Hampshire winters.)

Friday, December 30, 2011

Name Books

You wouldn't believe it by reading the internet, but making handmade gifts for babies is difficult!  Most of what I find on the web (that's something cute and something I would actually want to or could make) is for toddlers.  So this year, I was wracking my brain, trying to think of something to make for Daniel and Nickolas (last written about here).

Then, I went shopping with my girlfriend, Karina.  We talked about soft books and Daniel's incessant desire to chew on things.  We talked about how many baby gadgets Daniel owns already.  We talked about how Karina didn't purchase any books for Christmas.  Enter my bright idea!

Faithful readers, I give you the name book.  This personalized book measures about 5" square and is made entirely of scraps, including some of my precious Jay McCarroll stash.  Each page is dedicated to one letter of the child's name.  I tried to choose bold, bright prints for my letters, and I'm pretty sure I was successful.

DSCN0010

I used an iron-on adhesive in order to attach the letters to the page and top-stitched around each one for durability.  In order to keep this book truly soft and satisfyingly puffy, the pages are stuffed with fusible fleece.  Every page is neatly top-stitched.

DSCN0004

DSCN0009

These name books are based on an alphabet instruction concept commonly known to instructors of early and emergent readers.  When learning letters, it's a great idea to start with a child's own name, since those are the most interesting letters of all (it turns out that reading your own name is pretty motivating)!  Many teachers will help students create alphabet books using a child's name (and the names of their family or classmates) to help enforce alphabet recognition.

DSCN0002

Books like this are excellent toys because not only do they enforce letter recognition, they enforce print concepts, too!  When children play with books (and when we read to them), they learn that books start with a cover, that letters are found on the page, that we read from left to right.  Although this book is a little simple, it's a great introduction to print concepts like turning pages and seeing print on a page.

Although I made a soft name book for Nickolas and Daniel both, what you see in this post is a custom product created for a client.  Okay, not a client.  Karina asked me to make one for a coworker as a Christmas gift, and I obliged (And then she obliged by paying me. Cha-ching!).

I have future plans for other soft books and am considering creating a tutorial and pattern with templates for the name book and others.  Any interest?

Monday, December 19, 2011

Drawstring Backpack

Long time, no see!  There's been lots of sewing but not a lot of blogging going on these past few months.  I'm not pressuring myself to blog, or have lots of followers, or be high-profile enough to receive a free Panasonic 360 Cordless Iron to review (like everyone else).  Instead I'm just quietly going about my business, meeting with my stitching group weekly (they're more awesome than a free cordless iron), and sewing on whatever projects I want.

Recently, my school hosted our annual holiday celebration and silent auction.  In the past, I've offered whatever fun teacher-activity the PTA asked me to do.  This year, I suggested my own donation: a sewing lesson/workshop.  The winner had two project choices: drawstring backpack or the Keyka Lou Camera Case Wristlet.

The auction was won by the super-sweet Abigail, daughter of an awesome colleague.  She chose to work on a drawstring backpack and insisted that the bag include a zippered pocket-- cue Noodle Head's drawstring backpack tutorial (thanks, Amy!).

This tutorial is great!  I'm not a bag-sewer and three-dimensional objects are often out of my league.  I had to read through it a couple of times to get comfortable with the process, but once I started working it was smooth sailing.  Although it took me a minute to get comfortable sewing in 3D, this tutorial is simple and straightforward, and easy enough to make with a beginning sewer.  And the bag is cute!  And lined!  And has a fully finished zipper pocket!  To me, this is all very impressive; it doesn't seem like any of that should be easy, but it was.

After I made my practice bag, I invited Abigail over for an afternoon of sewing.  She loves purple, so I pulled a gorgeous purple Alexander Henry print from my stash.  Instead of using cording for the drawstrings, I purchased some pre-made double-fold bias tape in a coordinating color.  Before she arrived I cut the fabric pieces needed for construction and prepared the zippered pocket portion (for the sake of simplicity).  I also marked seam lines along each piece for Abigail to follow as she sewed.


Abigail was very excited to sew and got the hang of operating the machine right away.  We sewed several lines on scraps to practice guiding the fabric without pushing or pulling, and then began construction on the bag itself.  She did a fabulous job!  Clearly, this chick is a natural.  Her bag turned out pretty much perfect, despite some mistakes made by (and fixed by!) yours truly.


I've got to say: I'm extremely proud of this bag.  Not only was I able to successfully create a bag, but I was able to successfully help an 8-year old do it!  I feel extremely accomplished and I know Abigail does, too.  She even asked if we could sew together again!

Thursday, October 27, 2011

God, Country, Notre Dame

Long time, no see.  Mostly, I'm busy.  Also, I couldn't post about this until very recently!


Christopher and Lauren finally tied the knot, and I was able to give them their t-shirt quilt!  It was a big hit (Thank God!) and it was even halfway a surprise!  As usual, my favorite longarm quilter at Kept in Stitches Quilting did a fabulous job.

Sadly, I didn't get a picture of the back.  Solid blue, with a strip of gold across the middle.  In the gold section I had several ND logos taken from the sleeves of the t-shirts.  Very cool looking, I promise.

My apologies to the bride for the above photo.  Laser eyes look pretty good on her, though.

Monday, August 15, 2011

Finished Cushions

Here's that photo of the finished, stuff cushions I promised so long ago.  They look even better than I remember!

jenns pic v1 CROP

Saturday, July 16, 2011

Aunt Millie's Update 5

I'm smoking on this project!  Not only have I finished another block, but I also remade the center medallions for all the previous blocks and sewed them on.  Like I said, I'm smokin'!

DSCN1022

DSCN1021

This block was quick, easy, and fun to make.  A few of the fabrics in the kit weren't to my taste, so Kristal passed along some batiks to substitute.  The batiks add some charm.  I will definitely be doing some substitutions on block six because some of those unfortunate fabrics have repeated themselves.

Speaking of Kristal, we went to Quilter's Corner today where I found the perfect dot for upcoming scrappy hexagon project.  More on that later.

Block Six, coming up!

Tuesday, July 12, 2011

Hand Dye Redux

Remember last time?  I know I said I wanted to make sure I fully understand the process behind mixing dye baths and making colors before trying resist techniques, but I just couldn't resist getting in on Kristal's batik adventure.  (See what I did there?)

Over the weekend, Kristal convinced me to let little loose and just experiment.  I used my 50% off coupon to purchase 5 yards of prepared for dye Kona cotton-- it cost me less than $20, people!-- and helped make a huge mess on Kristal's patio.

We used several tools to apply the wax, including cookie cutters, cardboard tubes, carrots, and paintbrushes of different types and sizes.  First we waxed the fabric, then we dyed it.  After completing the dye process, we followed Malka's directions for removing the wax (found in her fabulous book).  I dyed five quarter-yard cuts of fabric.

DSCN1003

DSCN1005

DSCN1004

First, I created the stripes you see above.  I used a large, bristled paintbrush to apply these streaks of wax.  Everywhere that is white-- not really white, per se, but you get the idea-- is where I applied the wax.  The bristled paintbrush holds wax well, and allowed me to apply a long streak of wax.  You can see slightly where the wax overlapped.  The selvedge shows where I began my streak.  

The pattern and color on this piece of fabric closely resemble a big-top circus tent, therefore I have named this "print" Circus Stripes.  Look closely at the photos to see the subtle variations that come with all hand-dyed fabrics.  The gradations and lines that the dye left behind create a unique texture; no two pieces ever look the same.

DSCN1011

DSCN1009

DSCN1017

DSCN1013

This pattern, Pebble Doodle, was created using a foam paintbrush.  I painted the circles onto the fabric, one after another.  It was quite time consuming, but the end result is pleasing.  This piece of fabric particularly shows variations, especially where wax was not adequately applied to the fabric.  Overall, this is my favorite piece; I am looking forward to recreating it in several different colors, though I know the final products will each be different.

I loved the look of Pebble Doodle against the bricks of my building; brick is a beautiful pattern all its own.  Perhaps I will attempt to recreate that look and texture in my next experiment.

DSCN1008

DSCN1007

DSCN1006

This fun dot was created using a carrot grown in Kristal's garden.  After waxing about 3/4 of this piece the carrot was cooked and it began leaving orange streaks on the fabric!  We used a powder called "azure" to create this color-- an appropriate name, considering the pieces dyed in that particular bath look like the exact color of a summer sky.  

There are many drip dots on this piece, and although it was frustrating at the time, the end result is pleasing.  I love the look of these irregular dots, and the small splashes of wax between add the character that you just don't get in printed fabric.  

DSCN1002

DSCN1001

DSCN1000

This piece gave me fits from beginning to end!  I used a toilet tissue cardboard roll to stamp this pattern in an attempt to create a fabric spotted with rings.  The wax foiled me, however, and dripped just about each and every time I attempted to stamp the fabric (perhaps this was due to my shaky hands).  

Although it was frustrating at first, I embraced the lack of control and ended up with a beautiful piece of fabric.  This color is produced using a powder called "reddish purple" and is probably my favorite color of all the dyes we used.  The pattern-- called Coffee Rings-- is one that I will definitely reproduce again.

DSCN1020

DSCN1018
  

Everything did not go exactly perfect, which I struggle with.  I still don't get it with the dye bath creation and color mixing, but I guess that's okay for now.  Experimenting with wax and creating my own beautiful patterns on fabric was immensely satisfying, and so I guess all the knowledge and perfection can wait.  I will get there eventually, and hopefully will have more successful experiments along the way.

Sunday, April 3, 2011

Rainbow Baby Quilt

photo-2

The photo above shows Nickolas chilling out maxing relaxing all cool on the quilt I made for him recently. Is he not the cutest almost-nephew baby you've ever seen?

I made this quilt using the block that Solidia chose for her month in The Incredible Shrinking Quilters' Bee.  I have no idea where that block pattern came from, but when I saw this I knew I had to use that block to make a baby quilt.

I'm especially proud because I made not one but two quilts like this, and almost all of the materials came from my stash.  I had to purchase one or two pink prints and about four orange prints.  Kristal gave me a few black and white prints from her stash.  I pieced the batting out of scraps and made backing and binding from several yards of fabric I had in my closet.  I did, however, buy some nice thread for quilting.

Overall, I'd call the project a success.  Cute!

DSCN0970

Thursday, December 30, 2010

Finished Objects - 2010

This year has been a busy sewing year.  In addition to everything you see in my list and mosaic, I have completed countless blocks for The Incredible Shrinking Quilters' Bee and the Modify Tradition project.


Finished Objects - 2010

1. Luke's Quilt, 2. Cushion Covers, 3. Stuffed Toys, 4. Modify Tradition Top, 5. DQS9 Swap Quilt, 6. Geometric Pillow Cover, 7. Sea Glass Quilt, 8. Quilted Hexagon Needlebook, 9. Yellow Bricks Mini Quilt, 10. MT Swap Quilt, 11. Black Eyed Susans Quilt, 12. HEN ATC Swap, 13. Bow Tie Quilt, 14. Embroidered Valentine, 15. Embroidered Valentine, 16. Embroidered Valetine


I have plenty of goals for 2011, but if I don't post them here, I don't have to be accountable to them.  Wink, wink.  There are, however, many exciting things happening in the coming new year.  Mainly, I am getting married-- what fun-- and shall continue to approach graduate school with diligence (did I mention I've gone back and am now a UVA student?)-- I want to keep up with my 4.0.

What will the new year bring to you?

Sunday, December 26, 2010

Luke's Quilt

I've been long promising pictures of this finished quilt to Lesly.  So here they are!

DSCN0752

The quilt was made especially for my brother, Luke.  Luke is quite particular in his taste, and I was very nervous that he wouldn't like this quilt!  He has been noisily complaining about not having a quilt from me for a while now, and he was very surprised when he opened the package.  He even cried.

DSCN0753

The patchwork design is inspired by the City Green pattern in Cherri House's book, City Quilts.  I used my own measurements and a similar layout to come up with an equally beautiful quilt!

DSCN0754

Fabrics used include Carolina Chambrays by Robert Kaufman and a Timeless Treasures black dot print.  The chambrays are difficult to work with-- they consistently stretch and fray, leading to much need of squaring up.

DSCN0755

I pieced the back with fabric leftover from the front.  The quilt is quilted by my favorite local long arm quilter, Rebekah Richardson.  She chose an awesome geometric edge to edge design and quilted in a variegated thread that exactly matches the colors on the front.  View it large to better see the quilting motif.  It's wonderful!

DSCN0756

Sunday, October 10, 2010

13.8

No, 13.8 is not the distance I ran this weekend.  It's the number of pounds I have lost since July 26, 2010.  Not bad, right?  In the interest of full disclosure, I have to admit that I have lost this weight by following the Weight Watchers program.  Don't stop reading-- I'm not here to tell you to join.  I really did make a craft.

DSCN0733

Part of what ensures consistent weight loss is vigilance about portion control and points tracking.  Points are based on nutritional values, and WW gives each member a handy book chock full of nutritional information, including a scale used to determine the points values of any given food.

DSCN0737

It's all about making good choices; that's why I have been known to pull out my WW book at the grocery store.  I gotta admit-- I feel a little self-conscious when I pull the book out in front of all God's creation.  For some reason, I think everyone is going to automatically realize what I've got in my hands and know all about my fat-girl problems.  They might even start pointing and whispering.

DSCN0739

Since Lesly sent me a fat quarter recently to celebrate one of my losses, I decided to use that fabric to make a book cover for my WW book.  It turned out so cute!  I even made a slip through pocket so that I can easily access the points slider.  Now it's not so recognizable as a WW book; it looks just like a day planner or notebook.

DSCN0740

Sunday, July 25, 2010

Geometric Pillow Cover

DSCN0708

I finished this quilted pillow cover today.  There were so many problems with this!  My machine was having some tension problems, and so on the underside of the quilting there were loops-- the stitches weren't taught and the bobbin thread knots were visible on top.  I adjusted tension to no avail, and finally pulled off the throat plate of my machine.  Lo and behold, there was practically a whole pillow stuffed in there (including in the bobbin mechanism)!  After cleaning that out, my quilting looked perfect.

Somehow, when trimming, my quilted section was always 1/8" larger than I thought.  I would trim meticulously in an attempt to make it square, only to measure and find an extra 1/8" in there (I felt like I was in the house on Ash Tree Lane).

Finally, after the whole thing was just about done, I noticed an inch long gash-- yes, gash-- in the front of the pillow.  I have no idea how it got there; it could have been there, it could have gotten there during my aforementioned trimming session, who knows?  At any rate, after I got over the urge to give up, I used tweezers to put some fusible interfacing in there, and I just ironed it down.  Hopefully that will hold up.

The pillow has an envelope style back and is about 17" square.  I used a King Tut variegated thread for the quilting, which is just straight lines spaced 1" apart-- not wonky, just good old evenly spaced lines.  I did increase my stitch length to 4.0 for the quilting; longer stitches makes for nicer quilting!

It was very difficult to photograph this pillow.  I have a red couch-- I'm talking about red.  It was very difficult to get a decent photo, and even then I had to edit them quite a lot to make them acceptable. This was the only decent picture of the bunch, and it's terrible!  I'm going to have to practice photographing items inside the house.  Tips?

Saturday, July 3, 2010

Sea Glass

Today I hand-stitched 252 inches of binding.  My hands are feeling a bit gnarled.  But, I finished the Sea Glass quilt, just in time for the heat wave coming next week.  I slaved myself over the binding for hours today just so that Lesly could see it before she hops a plane to Berlin.

DSCN0704

The finished quilt measures 60"x66" and is made entirely of half-square triangles.  I used my tried and true method to get gorgeous half-square triangles.  All you have to do is cut squares 7/8" larger than your finished size, draw a diagonal line from corner to corner, stack, and sew 1/4" from either side of the line.  When you cut it in half, you'll have two perfect half-square triangles!

DSCN0700

My inspiration for this project comes from this quilt.  I loved the purple-brown solid she used and the collection of vibrant blues and turquoise prints.  When I saw it I knew immediately that I had to work with that color palette!  I must admit-- I pretty much copied her quilt but I don't feel terribly bad about it.

DSCN0699

This quilt is stuffed with bamboo batting, which is soft and silky and easy to sew.  Of course, bamboo fibers also attach to everything, so this quilt is covered in fuzz.  I didn't have any single pieces large enough for this quilt, so I stitched to large scraps together.  You can't even notice in the quilting!

DSCN0703

I quilted this in a grid pattern following the seam lines.  The quilting lines are 1/4" from the vertical and horizontal seams, but there is only one line for each seam.  After I quilted the vertical grid, I started having problems with fabric pushing and puckering, so I decided to stop after one set each of horizontal and vertical lines.

DSCN0701

I used a green variegated thread (King Tut #923) on top and a yellow 50 wt thread in the bobbin (Wonderfil KT403).  The top thread looks gorgeous and the bobbin thread blends beautifully with the background.  The only problem is that I can see the knots from the top thread on the back.  Anyone know how to solve this problem?

DSCN0702

Fabrics used include a bunch of random prints I found at my LQS, some Alexander Henry, some Kaffe Fassett, and two Lantern Bloom prints (Tile Mosaic in turquoise and citron), as well as a beautiful brown Kona cotton.  The quilt is backed with citron Tile Mosaic from the Lantern Bloom collection and bound with the same Kona brown from the front.

DSCN0705

Overall, I'd say it's gorgeous.  It definitely has some flaws-- my quilting hasn't reached the quality level that I desire, but that can only change with practice.  As the ladies at the LQS say, "better finished than perfect."  Except my binding is perfect.  For the record.

Thursday, July 1, 2010

Prairie Chic

I've done it.  I've finally finished Alison's bee blocks.  In case you were wondering, her month was May.  I feel awful.

DSCN0684

Alison sent us all several prints from Denyse Schmidt's recent fabric line, Hope Valley.

DSCN0683

The fabrics themselves are so soft and thick, and they cut like butter!  The request was to make a block made of 36 2" finished patches.  She sent plenty of fabric; I was going to sew three blocks to make up for being late, but I figured I'd better just send back the scraps instead of holding this fabric hostage.

DSCN0688

After I finished putting this task off-- you know, for months-- these blocks came together very quickly.  Much more quickly than I originally expected.  Alison asked that we press the seams open; this was the most time consuming part.

DSCN0690

My blocks followed two color schemes-- pink and blue, and yellow, green, and blue.  That's how the fabrics grouped themselves in my eyes, and so that's how I sewed them.  It seems that everyone else is pretty much thinking the same way!

DSCN0693

I hope Alison likes these blocks; I've made her wait long enough.   At least I got them finished before she had her baby.  If you can grow a baby faster than I can make two quilt blocks... well, that's saying something.

DSCN0696