Wish I was back here, pina colada in hand. No worries, no responsibilities. No online classes. Just me and my man. And the pina coladas.
Wednesday, July 27, 2011
Saturday, July 16, 2011
Aunt Millie's Update 5
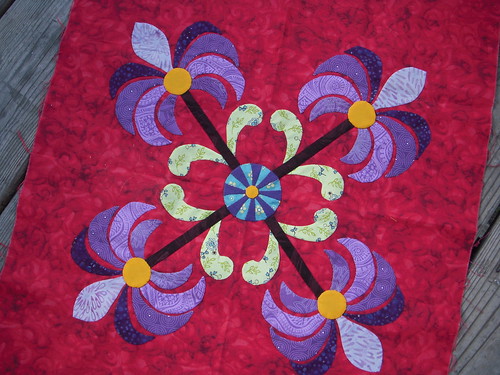
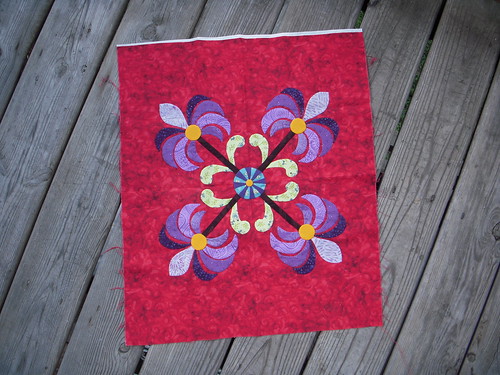
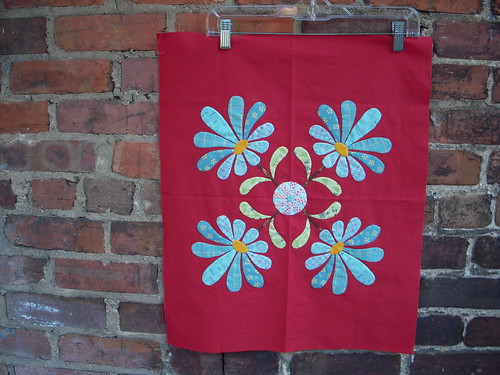
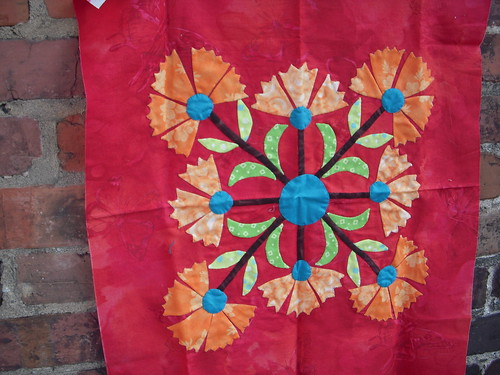
I'm smoking on this project! Not only have I finished another block, but I also remade the center medallions for all the previous blocks and sewed them on. Like I said, I'm smokin'!
This block was quick, easy, and fun to make. A few of the fabrics in the kit weren't to my taste, so Kristal passed along some batiks to substitute. The batiks add some charm. I will definitely be doing some substitutions on block six because some of those unfortunate fabrics have repeated themselves.
Speaking of Kristal, we went to Quilter's Corner today where I found the perfect dot for upcoming scrappy hexagon project. More on that later.
Speaking of Kristal, we went to Quilter's Corner today where I found the perfect dot for upcoming scrappy hexagon project. More on that later.
Block Six, coming up!
Aunt Millie's Update 4
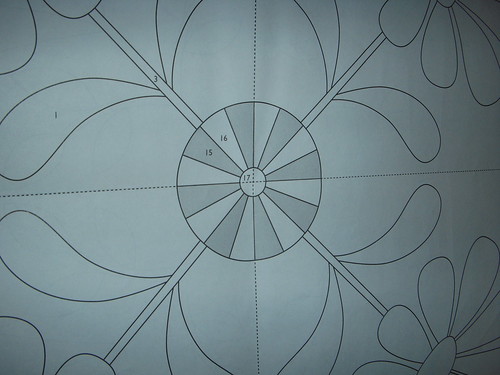
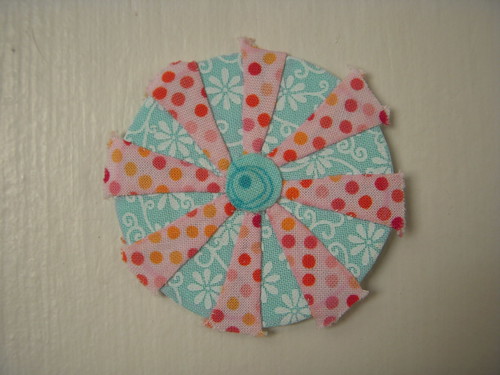
I adore this block, probably because of the cute little medallion in the middle. I've been told that most of the folks who participated in this block of the month (organized by Quilting Adventures) didn't sew the medallions. Some folks made yo-yos and others used fabric to mimic the look of the striped medallion. I must say, actually sewing the real thing makes the block look a thousand times better!
At first, appliqueing that thing seemed impossible, but after I actually sat down and put my mind to it, the process is fairly simple. The pattern calls for a circle of fabric with colorful wedges appliqued on, topped off with a smaller circle in the very middle.
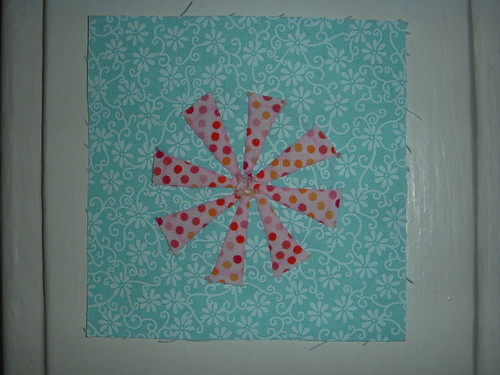
First, I traced the circle and the lines on the background fabric. I didn't cut it out; instead, I left it on a large square of fabric to make handling easier. Look closely and you can see the traced outline.
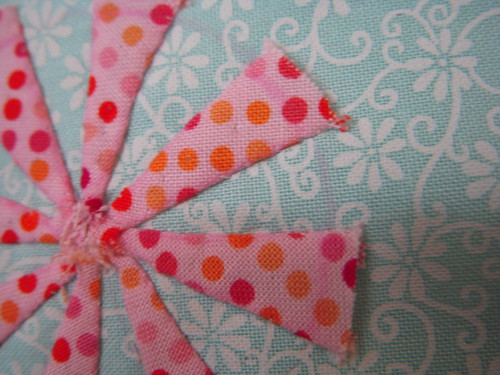
Next, I appliqued all the wedges to the background. It was a fairly straightforward process; I left a bit of overhang in the center and off the edge. Once the wedges were on, I appliqued the teeny tiny circle in the middle (not pictured here).
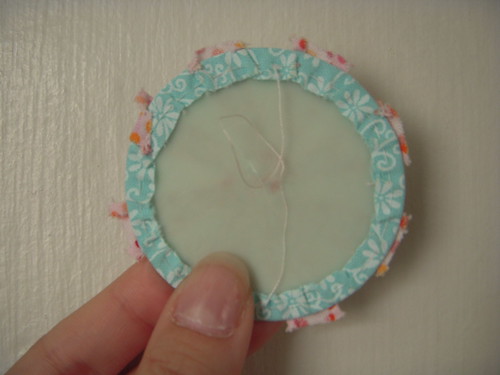
After applique, I trimmed the background fabric into a rough circle. Using a running stitch, I sewed around the outline and cinched it around a plastic template. Press, remove template, then press again. Voila! Circle!
Tuesday, July 12, 2011
Hand Dye Redux
Remember last time? I know I said I wanted to make sure I fully understand the process behind mixing dye baths and making colors before trying resist techniques, but I just couldn't resist getting in on Kristal's batik adventure. (See what I did there?)
Over the weekend, Kristal convinced me to let little loose and just experiment. I used my 50% off coupon to purchase 5 yards of prepared for dye Kona cotton-- it cost me less than $20, people!-- and helped make a huge mess on Kristal's patio.
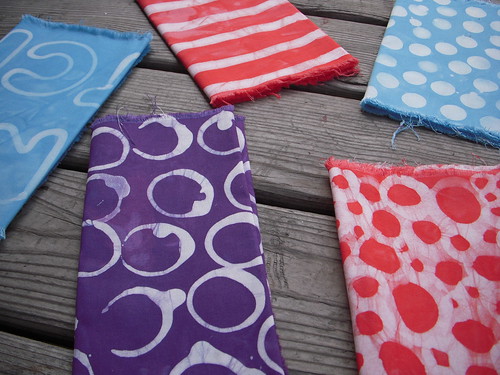
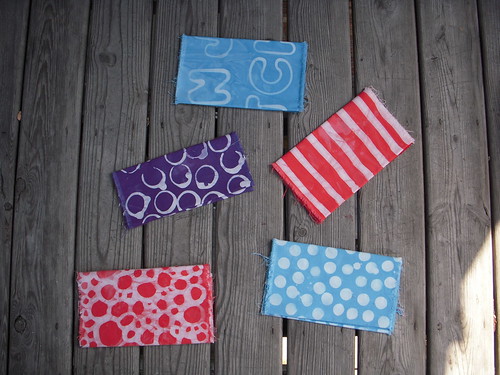
We used several tools to apply the wax, including cookie cutters, cardboard tubes, carrots, and paintbrushes of different types and sizes. First we waxed the fabric, then we dyed it. After completing the dye process, we followed Malka's directions for removing the wax (found in her fabulous book). I dyed five quarter-yard cuts of fabric.
Everything did not go exactly perfect, which I struggle with. I still don't get it with the dye bath creation and color mixing, but I guess that's okay for now. Experimenting with wax and creating my own beautiful patterns on fabric was immensely satisfying, and so I guess all the knowledge and perfection can wait. I will get there eventually, and hopefully will have more successful experiments along the way.
Over the weekend, Kristal convinced me to let little loose and just experiment. I used my 50% off coupon to purchase 5 yards of prepared for dye Kona cotton-- it cost me less than $20, people!-- and helped make a huge mess on Kristal's patio.
We used several tools to apply the wax, including cookie cutters, cardboard tubes, carrots, and paintbrushes of different types and sizes. First we waxed the fabric, then we dyed it. After completing the dye process, we followed Malka's directions for removing the wax (found in her fabulous book). I dyed five quarter-yard cuts of fabric.
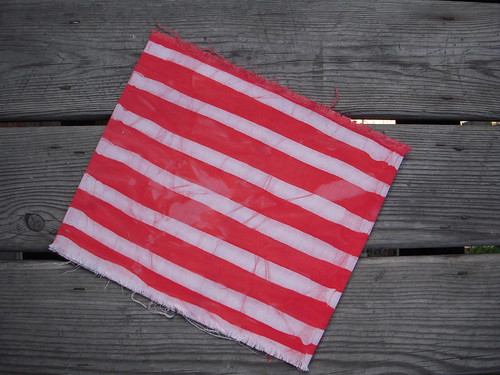
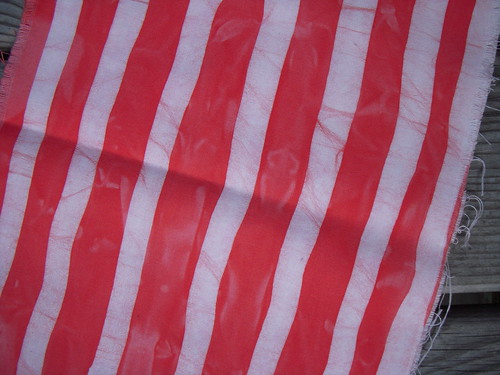
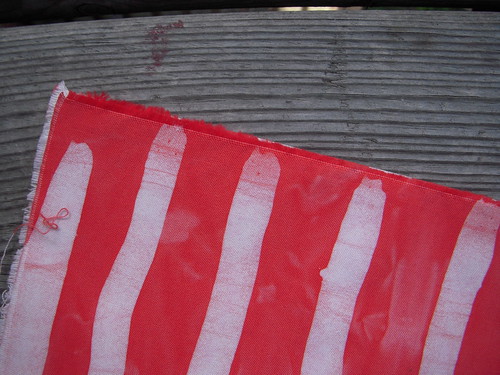
First, I created the stripes you see above. I used a large, bristled paintbrush to apply these streaks of wax. Everywhere that is white-- not really white, per se, but you get the idea-- is where I applied the wax. The bristled paintbrush holds wax well, and allowed me to apply a long streak of wax. You can see slightly where the wax overlapped. The selvedge shows where I began my streak.
The pattern and color on this piece of fabric closely resemble a big-top circus tent, therefore I have named this "print" Circus Stripes. Look closely at the photos to see the subtle variations that come with all hand-dyed fabrics. The gradations and lines that the dye left behind create a unique texture; no two pieces ever look the same.
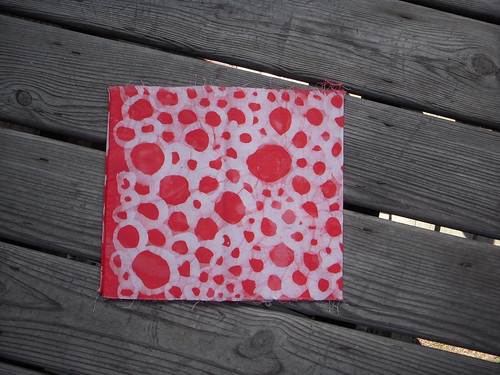
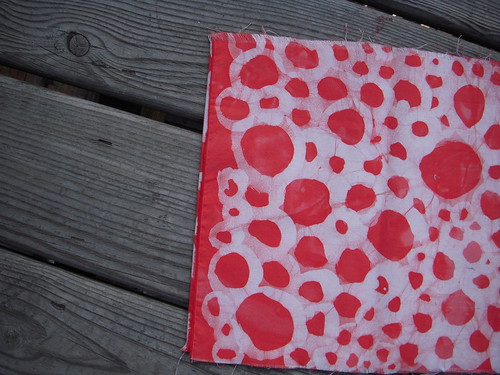
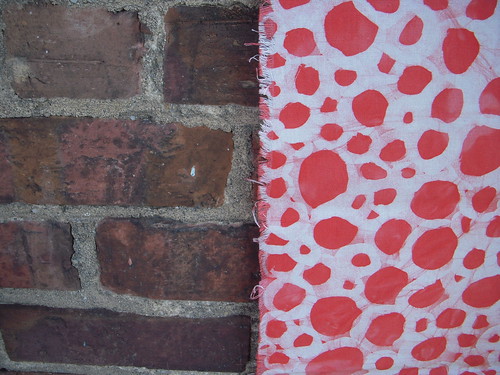
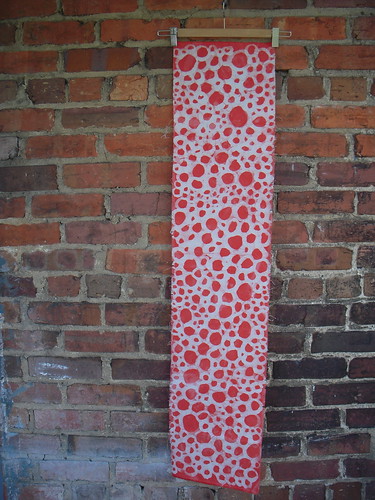
This pattern, Pebble Doodle, was created using a foam paintbrush. I painted the circles onto the fabric, one after another. It was quite time consuming, but the end result is pleasing. This piece of fabric particularly shows variations, especially where wax was not adequately applied to the fabric. Overall, this is my favorite piece; I am looking forward to recreating it in several different colors, though I know the final products will each be different.
I loved the look of Pebble Doodle against the bricks of my building; brick is a beautiful pattern all its own. Perhaps I will attempt to recreate that look and texture in my next experiment.
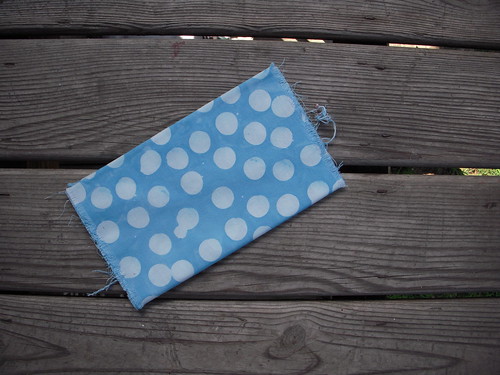
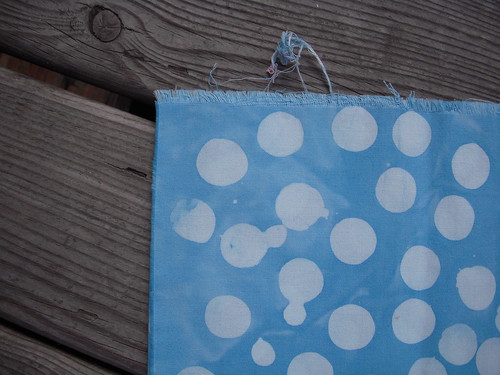
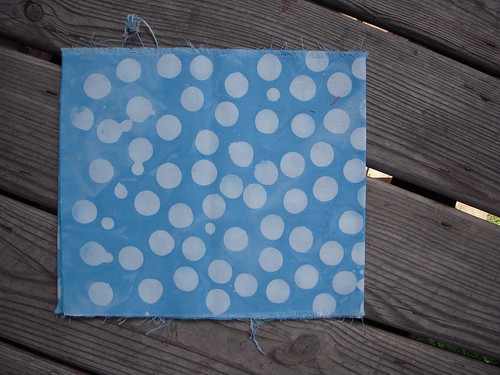
This fun dot was created using a carrot grown in Kristal's garden. After waxing about 3/4 of this piece the carrot was cooked and it began leaving orange streaks on the fabric! We used a powder called "azure" to create this color-- an appropriate name, considering the pieces dyed in that particular bath look like the exact color of a summer sky.
There are many drip dots on this piece, and although it was frustrating at the time, the end result is pleasing. I love the look of these irregular dots, and the small splashes of wax between add the character that you just don't get in printed fabric.
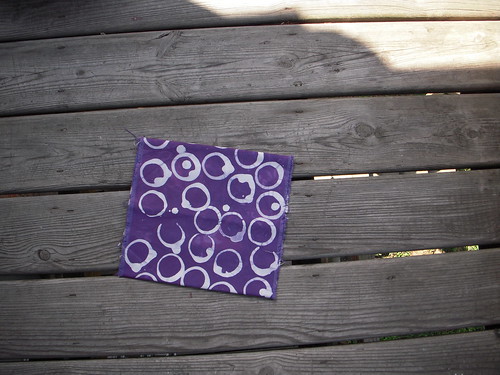
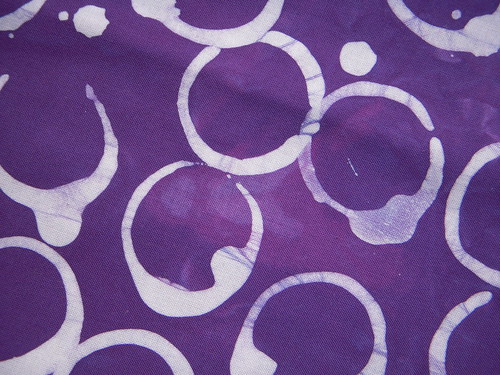
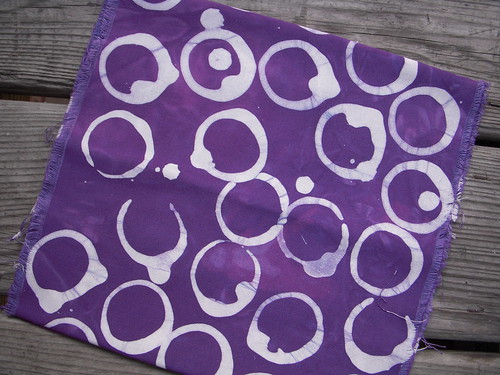
This piece gave me fits from beginning to end! I used a toilet tissue cardboard roll to stamp this pattern in an attempt to create a fabric spotted with rings. The wax foiled me, however, and dripped just about each and every time I attempted to stamp the fabric (perhaps this was due to my shaky hands).
Although it was frustrating at first, I embraced the lack of control and ended up with a beautiful piece of fabric. This color is produced using a powder called "reddish purple" and is probably my favorite color of all the dyes we used. The pattern-- called Coffee Rings-- is one that I will definitely reproduce again.
Everything did not go exactly perfect, which I struggle with. I still don't get it with the dye bath creation and color mixing, but I guess that's okay for now. Experimenting with wax and creating my own beautiful patterns on fabric was immensely satisfying, and so I guess all the knowledge and perfection can wait. I will get there eventually, and hopefully will have more successful experiments along the way.
Labels:
finished objects,
hand dye,
my special techniques
Tuesday, July 5, 2011
Aunt Millie's Update 3
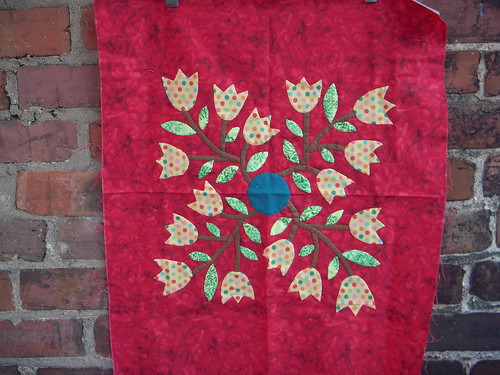
Here are the photos of my currently finished blocks, from beginning to end. See my previous post for hand applique tips.
I purchased the pattern and a kit for each block in this project. Additionally, I attended one group meeting (and paid the class fee) dedicated to this block of the month. Each kit was $19.99; I also purchased a finishing kit that includes materials for the appliqued border and patchwork sashing. Let's just say I've sunk several dollars into this project, and so no matter how tedious it becomes, I must finish it!
The first block took me about a year to finish. I did use the freezer paper method for this block, which probably took quite a bit of extra time. In retrospect, this method doesn't create any better results than plain ol' turning under.
I've come quite far; when I look at that block, I want to redo it! All those points made me crazy, but of course it gave me quite a bit of practice in making nice points. Additionally, I attached some of the pieces out of order because I wasn't paying attention. I haven't fully decided if I will redo the block, but it is nice to compare this block to the others and to see how far my skills have come.
The second block was never photographed and today I only took one; perhaps that is a subconscious way of saying I don't really care for it? I do like the block, but only a little. Perhaps I will like it more after I redo the center medallion (more on that later). Can you see how much nicer this block is than the previous?
I finished this at the prodding of the ladies in my sewing group; they really helped reignite my excitement for this project. It's only because of them that I'm on my current finishing streak! Hopefully they'll keep me excited about it. (Do you like how I'm giving them all the responsibility for making sure this project is finished?)
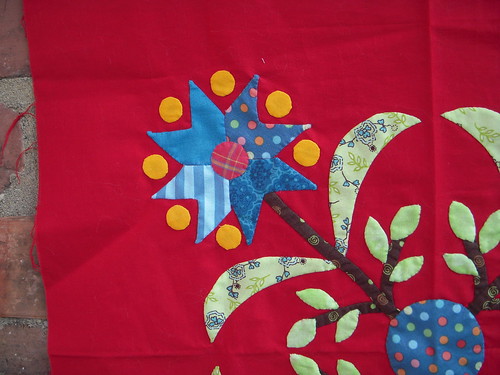
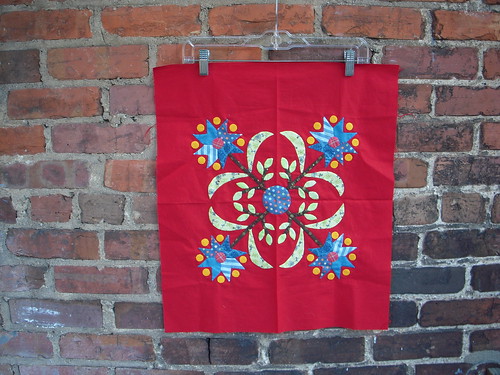
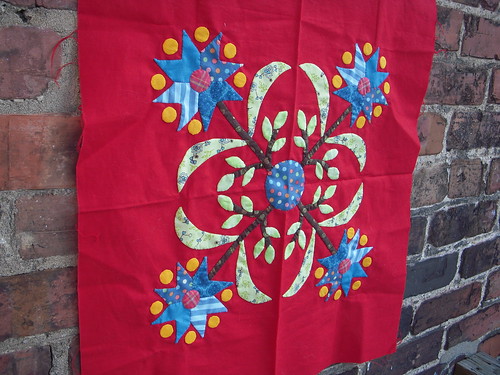
The project sat for quite a bit before I began the third block. This one is probably my favorite so far; I love the little yellow dots all around the flower heads and although I waffled about sewing them on (I was feeling burnt out), I'm glad I did.
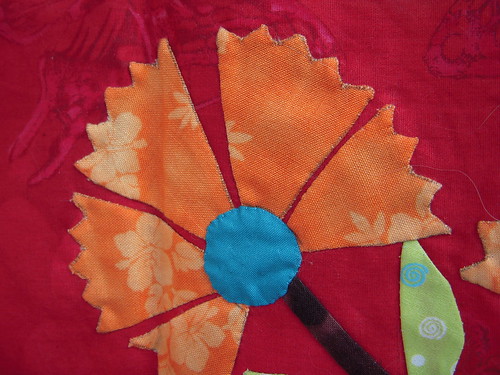
I deviated from the original pattern to make things just a bit simpler for myself. Each flower head is supposed to be composed of eight petals; instead, I joined the petals together to create four, preserving the shape but removing the complication of perfectly lining up eight pieces. The overall design doesn't suffer-- it's still plenty cute!
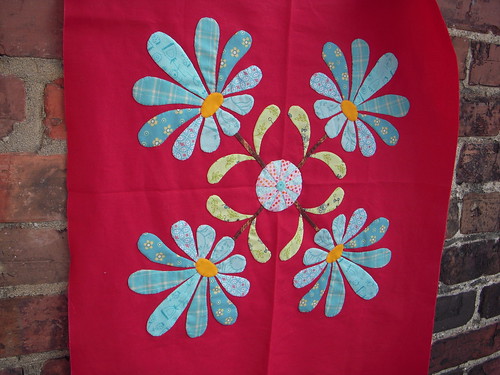
The fourth block was completed in only about a week's time. I did some of the sewing on my honeymoon-- in the airport on the way home, duh-- but finished it over the past weekend. The petals here are absolutely beautiful and they were fairly simple to applique because they are large and have gentle curves. I did have some difficulty when appliqueing the centers to the flowers-- I wasn't able to easily cover all raw edges-- but some pushing, stuffing, and stretching solved all that.
This block has the beautiful appliqued center medallion, unlike the others. Although the striped center medallion looks cute, it was not easy nor simple to make. (More on that later.) Despite its time-consuming difficulty, I will definitely be doing the other blocks to match. Perhaps not right away, but over the course of this project.
When comparing the first block to the most recent, the difference in skill level is obvious. My hands may turn arthritic and gnarled, but I will be an applique expert when I finish this project (someday). Overall, I am enjoying the applique experience. Perhaps later I won't say the same thing, but for today I am quite satisfied. I can't wait to finished the next block-- another simple one with large pieces and curves-- and see the fruit of my newfound skills.
Aunt Millie's Update 2
As we speak (type), I have finished exactly four-- count them!-- Aunt Millie's Garden blocks. The first I finished in summer 2010. The second was finished sometime between then and now; I'm unable to pin a timeframe on that one because I never even took pictures of it until now. The third and fourth were finished two weeks ago and last week, respectively.
The vinyl overlay method has been slow but much less tedious than using freezer paper or hard plastic templates. I don't follow this exact process, but at least that link gives you some idea of how I applique.
1. Less seam allowance is more. It's scary to trim a scant seam allowance when doing applique because one slip and you've wrecked your piece. Also, fraying is a concern. However, I've found that smooth curves are easier to create with less seam allowance, and there is also typically less fraying because you have less fabric you are trying to turn under.
2. Use the lightest marking pencil tint possible. Early on I used a black marking pencil. The line markings are just visible on the edges of those pieces, and it makes all the applique look very dirty around the edges. Currently, my tint of choice is pink. It is working out really well.
3. Pulling stitches too tightly makes them more visible. At times, when we tighten our hand stitches they disappear into the fabric. During the course of this project, I've noticed that sometimes tightening stitches makes them more visible, rather than less. Take care not to pull too tightly, otherwise you will get a ruffly edge around your piece, and the finished product will not be as smooth as you'd like.
4. Using a light box to trace is much more helpful than tracing on the window or using the television. I recently purchased one for myself. More details coming soon.
5. Trimming and snipping leads to crisper points. Points, of course, suck. Ugly points suck even more. It has been much easier to create satisfactory points by trimming and snipping at the vertices, then folding and tucking. I snip right up to the point, just a few threads from the fold line. Then, I tuck and fold the seam allowance in, trimming extra where necessary. If I had five hands I could take a video or pictures and show you.
6. Sew right to left. I am right-handed, and sewing right to left makes it much easier for me to turn and sew, turn and sew. Perhaps southpaws should sew in the opposite direction?
7. One thread does not fit all. There is not a universal color that will work with all fabrics-- if the thread does not disappear just right against the fabric, then the stitches are visible and that is crazy-making. And before you tell me to try that invisible thread stuff, know this: it is impossible to get a good knot with invisible thread.
Subscribe to:
Comments (Atom)

