Instead of doing a big year-end post like most folks, I'm into looking forward this year. 2011 was fine, sewing-wise; I made three bed-sized quilts, lots of progress on my Aunt Millie's project, and had several small finishes. The problem is, I didn't really do anything new, and I still have a couple unfinished and neglected projects hanging around my head.
This recent realization about my lack of sewing progress has led me to think about what I want to be doing. There are so many answers to this question, I don't even know where to begin. So I won't try (not here, anyway).
I recently saw 365: A Daily Creativity Journal in a bookstore and became intrigued. I've always found the 365 projects admirable, but unapproachable. They seem constraining and keep a punishing pace; what if you fall behind?! But the accountability of these projects is appealing. They set an expectation about what will be done, and when. This is a lot different than making as you go-- it's pretty easy to leave an unfinished project in the closet for eternity, especially when there's no deadline to finish.
I'm not promising to undertake some kind of 365: Sewing challenge. Like I said, I find those projects to be too regimented and maybe even impossible to accomplish. Instead, I plan on setting small, manageable goals for each month of 2012. Posting them here will give me the accountability that I appreciate and the short time line will be motivating and approachable.
Here's hoping this process will be motivating, not taxing. Stay tuned for my January goals.
Saturday, December 31, 2011

Friday, December 30, 2011
Name Books
You wouldn't believe it by reading the internet, but making handmade gifts for babies is difficult! Most of what I find on the web (that's something cute and something I would actually want to or could make) is for toddlers. So this year, I was wracking my brain, trying to think of something to make for Daniel and Nickolas (last written about here).
Then, I went shopping with my girlfriend, Karina. We talked about soft books and Daniel's incessant desire to chew on things. We talked about how many baby gadgets Daniel owns already. We talked about how Karina didn't purchase any books for Christmas. Enter my bright idea!
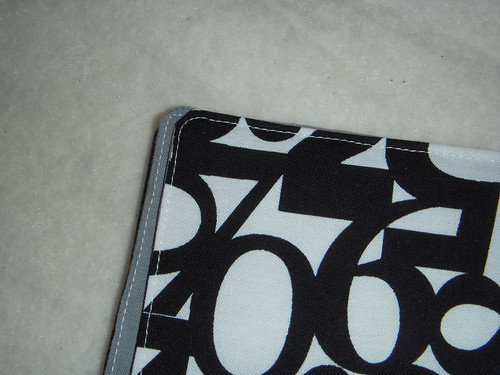
Faithful readers, I give you the name book. This personalized book measures about 5" square and is made entirely of scraps, including some of my precious Jay McCarroll stash. Each page is dedicated to one letter of the child's name. I tried to choose bold, bright prints for my letters, and I'm pretty sure I was successful.
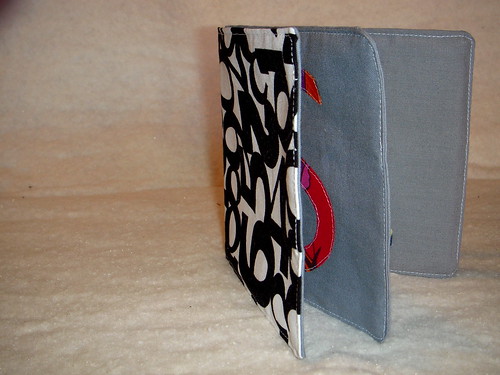
I used an iron-on adhesive in order to attach the letters to the page and top-stitched around each one for durability. In order to keep this book truly soft and satisfyingly puffy, the pages are stuffed with fusible fleece. Every page is neatly top-stitched.
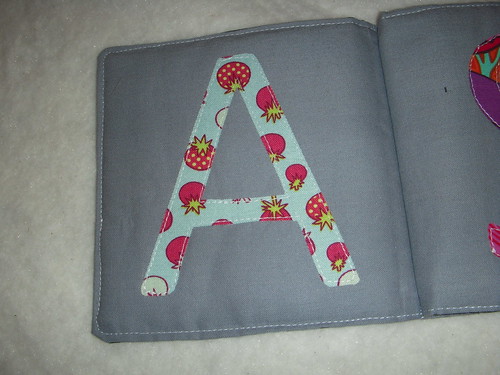
These name books are based on an alphabet instruction concept commonly known to instructors of early and emergent readers. When learning letters, it's a great idea to start with a child's own name, since those are the most interesting letters of all (it turns out that reading your own name is pretty motivating)! Many teachers will help students create alphabet books using a child's name (and the names of their family or classmates) to help enforce alphabet recognition.
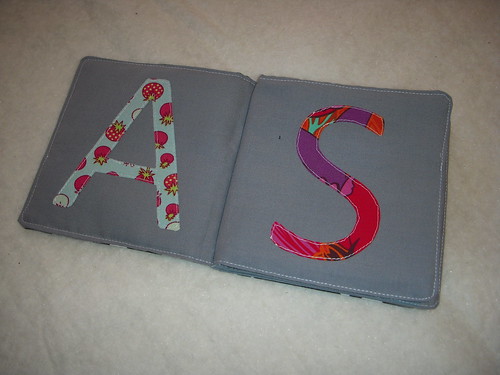
Books like this are excellent toys because not only do they enforce letter recognition, they enforce print concepts, too! When children play with books (and when we read to them), they learn that books start with a cover, that letters are found on the page, that we read from left to right. Although this book is a little simple, it's a great introduction to print concepts like turning pages and seeing print on a page.
Although I made a soft name book for Nickolas and Daniel both, what you see in this post is a custom product created for a client. Okay, not a client. Karina asked me to make one for a coworker as a Christmas gift, and I obliged (And then she obliged by paying me. Cha-ching!).
I have future plans for other soft books and am considering creating a tutorial and pattern with templates for the name book and others. Any interest?
Then, I went shopping with my girlfriend, Karina. We talked about soft books and Daniel's incessant desire to chew on things. We talked about how many baby gadgets Daniel owns already. We talked about how Karina didn't purchase any books for Christmas. Enter my bright idea!
Faithful readers, I give you the name book. This personalized book measures about 5" square and is made entirely of scraps, including some of my precious Jay McCarroll stash. Each page is dedicated to one letter of the child's name. I tried to choose bold, bright prints for my letters, and I'm pretty sure I was successful.
I used an iron-on adhesive in order to attach the letters to the page and top-stitched around each one for durability. In order to keep this book truly soft and satisfyingly puffy, the pages are stuffed with fusible fleece. Every page is neatly top-stitched.
Books like this are excellent toys because not only do they enforce letter recognition, they enforce print concepts, too! When children play with books (and when we read to them), they learn that books start with a cover, that letters are found on the page, that we read from left to right. Although this book is a little simple, it's a great introduction to print concepts like turning pages and seeing print on a page.
Although I made a soft name book for Nickolas and Daniel both, what you see in this post is a custom product created for a client. Okay, not a client. Karina asked me to make one for a coworker as a Christmas gift, and I obliged (And then she obliged by paying me. Cha-ching!).
I have future plans for other soft books and am considering creating a tutorial and pattern with templates for the name book and others. Any interest?
Monday, December 19, 2011
Drawstring Backpack
Long time, no see! There's been lots of sewing but not a lot of blogging going on these past few months. I'm not pressuring myself to blog, or have lots of followers, or be high-profile enough to receive a free Panasonic 360 Cordless Iron to review (like everyone else). Instead I'm just quietly going about my business, meeting with my stitching group weekly (they're more awesome than a free cordless iron), and sewing on whatever projects I want.
Recently, my school hosted our annual holiday celebration and silent auction. In the past, I've offered whatever fun teacher-activity the PTA asked me to do. This year, I suggested my own donation: a sewing lesson/workshop. The winner had two project choices: drawstring backpack or the Keyka Lou Camera Case Wristlet.
The auction was won by the super-sweet Abigail, daughter of an awesome colleague. She chose to work on a drawstring backpack and insisted that the bag include a zippered pocket-- cue Noodle Head's drawstring backpack tutorial (thanks, Amy!).
This tutorial is great! I'm not a bag-sewer and three-dimensional objects are often out of my league. I had to read through it a couple of times to get comfortable with the process, but once I started working it was smooth sailing. Although it took me a minute to get comfortable sewing in 3D, this tutorial is simple and straightforward, and easy enough to make with a beginning sewer. And the bag is cute! And lined! And has a fully finished zipper pocket! To me, this is all very impressive; it doesn't seem like any of that should be easy, but it was.
After I made my practice bag, I invited Abigail over for an afternoon of sewing. She loves purple, so I pulled a gorgeous purple Alexander Henry print from my stash. Instead of using cording for the drawstrings, I purchased some pre-made double-fold bias tape in a coordinating color. Before she arrived I cut the fabric pieces needed for construction and prepared the zippered pocket portion (for the sake of simplicity). I also marked seam lines along each piece for Abigail to follow as she sewed.
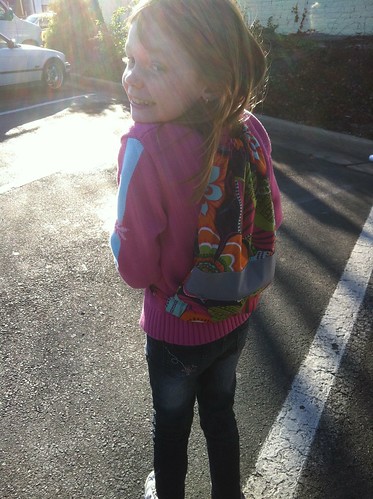
Abigail was very excited to sew and got the hang of operating the machine right away. We sewed several lines on scraps to practice guiding the fabric without pushing or pulling, and then began construction on the bag itself. She did a fabulous job! Clearly, this chick is a natural. Her bag turned out pretty much perfect, despite some mistakes made by (and fixed by!) yours truly.

I've got to say: I'm extremely proud of this bag. Not only was I able to successfully create a bag, but I was able to successfully help an 8-year old do it! I feel extremely accomplished and I know Abigail does, too. She even asked if we could sew together again!
Recently, my school hosted our annual holiday celebration and silent auction. In the past, I've offered whatever fun teacher-activity the PTA asked me to do. This year, I suggested my own donation: a sewing lesson/workshop. The winner had two project choices: drawstring backpack or the Keyka Lou Camera Case Wristlet.
The auction was won by the super-sweet Abigail, daughter of an awesome colleague. She chose to work on a drawstring backpack and insisted that the bag include a zippered pocket-- cue Noodle Head's drawstring backpack tutorial (thanks, Amy!).
This tutorial is great! I'm not a bag-sewer and three-dimensional objects are often out of my league. I had to read through it a couple of times to get comfortable with the process, but once I started working it was smooth sailing. Although it took me a minute to get comfortable sewing in 3D, this tutorial is simple and straightforward, and easy enough to make with a beginning sewer. And the bag is cute! And lined! And has a fully finished zipper pocket! To me, this is all very impressive; it doesn't seem like any of that should be easy, but it was.
After I made my practice bag, I invited Abigail over for an afternoon of sewing. She loves purple, so I pulled a gorgeous purple Alexander Henry print from my stash. Instead of using cording for the drawstrings, I purchased some pre-made double-fold bias tape in a coordinating color. Before she arrived I cut the fabric pieces needed for construction and prepared the zippered pocket portion (for the sake of simplicity). I also marked seam lines along each piece for Abigail to follow as she sewed.
Abigail was very excited to sew and got the hang of operating the machine right away. We sewed several lines on scraps to practice guiding the fabric without pushing or pulling, and then began construction on the bag itself. She did a fabulous job! Clearly, this chick is a natural. Her bag turned out pretty much perfect, despite some mistakes made by (and fixed by!) yours truly.
I've got to say: I'm extremely proud of this bag. Not only was I able to successfully create a bag, but I was able to successfully help an 8-year old do it! I feel extremely accomplished and I know Abigail does, too. She even asked if we could sew together again!
Thursday, October 27, 2011
God, Country, Notre Dame
Long time, no see. Mostly, I'm busy. Also, I couldn't post about this until very recently!

Christopher and Lauren finally tied the knot, and I was able to give them their t-shirt quilt! It was a big hit (Thank God!) and it was even halfway a surprise! As usual, my favorite longarm quilter at Kept in Stitches Quilting did a fabulous job.
Sadly, I didn't get a picture of the back. Solid blue, with a strip of gold across the middle. In the gold section I had several ND logos taken from the sleeves of the t-shirts. Very cool looking, I promise.
My apologies to the bride for the above photo. Laser eyes look pretty good on her, though.
Christopher and Lauren finally tied the knot, and I was able to give them their t-shirt quilt! It was a big hit (Thank God!) and it was even halfway a surprise! As usual, my favorite longarm quilter at Kept in Stitches Quilting did a fabulous job.
Sadly, I didn't get a picture of the back. Solid blue, with a strip of gold across the middle. In the gold section I had several ND logos taken from the sleeves of the t-shirts. Very cool looking, I promise.
My apologies to the bride for the above photo. Laser eyes look pretty good on her, though.
Monday, September 12, 2011
Tuesday, August 23, 2011
Tremor Tuesday
Today I experienced my first (and hopefully last ever) earthquake. At first it was confusing and then became utterly terrifying. My house was shaking so badly I thought it would collapse. I ran outside as fast as I could and left the cat to fend for herself.
I'm not sure what's proper emergency protocol for earthquakes, but many of my neighbors came out of their buildings as well. There was an older gentleman standing on the sidewalk across the street when I came out and I shouted over to him, "What was that?!"
He said, "I reckon it was an earthquake."
Monday, August 15, 2011
Finished Cushions
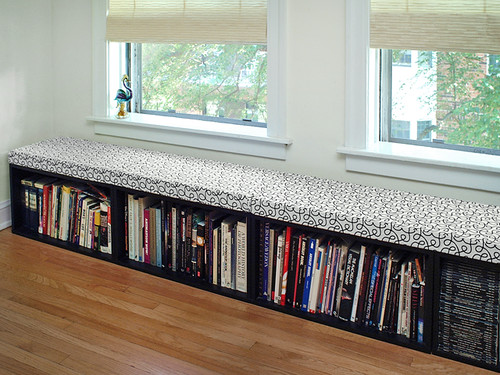
Here's that photo of the finished, stuff cushions I promised so long ago. They look even better than I remember!
Thursday, August 11, 2011
Sewing Machine
I have sworn off all forms of virtual bees, swaps, and quilt alongs for 2011. Most of you reading probably already know this. Over the past couple years, I have found that those types of activities suck all the fun right out of sewing. It goes back to that quilting with obligation thing, no?
But, I’m a sucker for plain-old, straight-up, old-fashioned patchwork. Especially if it's made of cute little squares. If it's cute little squares, I’m there.
Which is how I find myself in a contradiction.
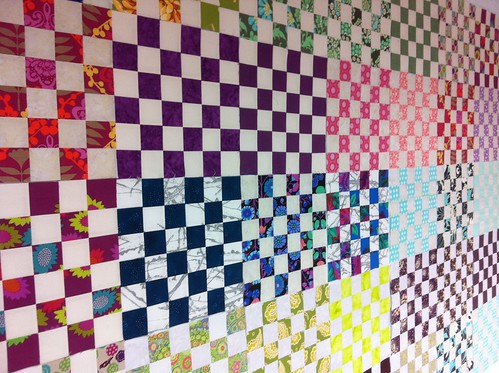
I’m sure you’ve seen the 36-patch quilt-along over at Crazy Mom Quilts. And you see how I might be enticed. Those blocks are adorable. Not only are they adorable, but they are also easy. Strip-piecing? Check.
Make no mistake: I am not quilting along. So let’s just get that straight. I am, however, making 36-patch blocks because they are cute. I’m not going to stay on any kind of schedule or add photos to the flickr group, because those are the things about quilt-alongs that stress me out. Instead, I’m going to be inspired by Amanda Jean’s idea and I’m going to make some sweet, traditional patchwork blocks.
Now that’s out of the way.
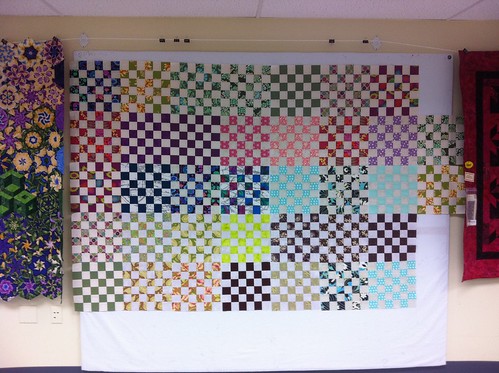
I am strip piecing these blocks using fabric from my stash: one neutral and one print. As of now, I am at a standstill because I am out of neutral fabrics! That’s really too bad, considering I was on a roll; so far, I’ve got 37 blocks complete, and that’s after only three (four?) sewing sessions.
I used the Robert Kaufman QuiltCalc to figure out how much yardage I’ve used. (It’s pretty easy to do this using the “pieces to yardage area” calculator.)
Sessions one and two yielded a combined 10 blocks (six strips per block, 2.5” x 16.5”, 60 strips in all) and used a total of 2 1/8 yards of fabric from my stash.
Session three (and four?) spanned two days and yielded 27 blocks! That eliminated another 5 5/8 yards of stash fabrics.
Total destruction? 7 ¾ yards of stash busted and I’m already nearly halfway to a queen-sized quilt top.
It’s okay; you can clap.
Friday, August 5, 2011
Overpaid?
I've always thought Matt Damon was cute, especially in Good Will Hunting and the Bourne Identity movies. Maybe even in The Talented Mr. Ripley, where he was also extremely creepy. I'll admit it-- I wanted to kiss Matt Damon.
Now I want to kiss him for real. A great, big sloppy one, right on the lips!
Now I want to kiss him for real. A great, big sloppy one, right on the lips!
Wednesday, July 27, 2011
Wishlist Wednesday
Wish I was back here, pina colada in hand. No worries, no responsibilities. No online classes. Just me and my man. And the pina coladas.

Saturday, July 16, 2011
Aunt Millie's Update 5
I'm smoking on this project! Not only have I finished another block, but I also remade the center medallions for all the previous blocks and sewed them on. Like I said, I'm smokin'!
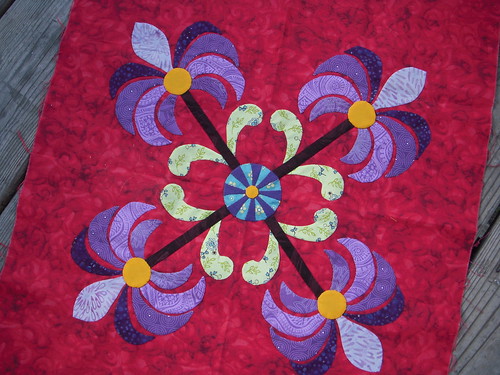
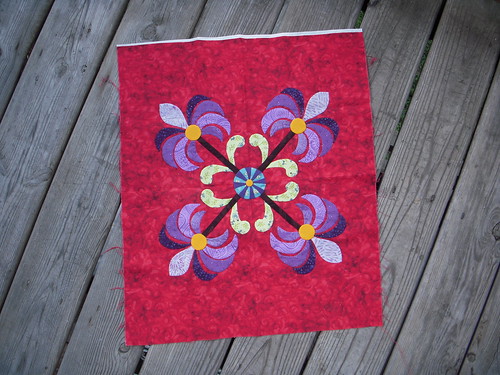
This block was quick, easy, and fun to make. A few of the fabrics in the kit weren't to my taste, so Kristal passed along some batiks to substitute. The batiks add some charm. I will definitely be doing some substitutions on block six because some of those unfortunate fabrics have repeated themselves.
Speaking of Kristal, we went to Quilter's Corner today where I found the perfect dot for upcoming scrappy hexagon project. More on that later.
Speaking of Kristal, we went to Quilter's Corner today where I found the perfect dot for upcoming scrappy hexagon project. More on that later.
Block Six, coming up!
Aunt Millie's Update 4
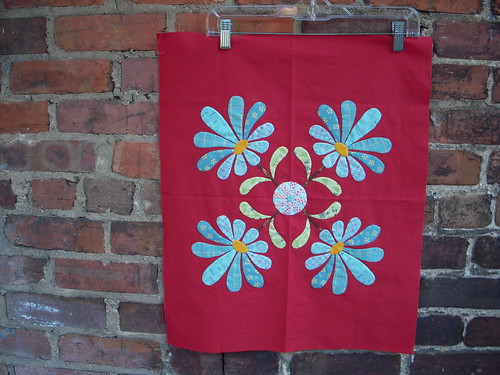
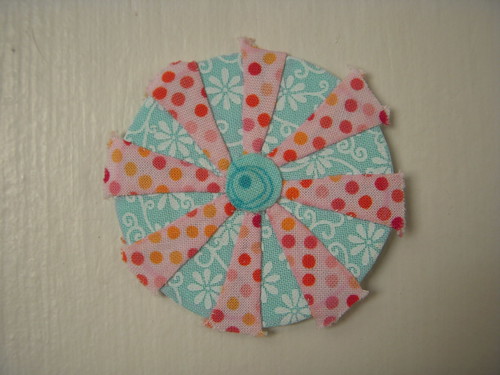
I adore this block, probably because of the cute little medallion in the middle. I've been told that most of the folks who participated in this block of the month (organized by Quilting Adventures) didn't sew the medallions. Some folks made yo-yos and others used fabric to mimic the look of the striped medallion. I must say, actually sewing the real thing makes the block look a thousand times better!
At first, appliqueing that thing seemed impossible, but after I actually sat down and put my mind to it, the process is fairly simple. The pattern calls for a circle of fabric with colorful wedges appliqued on, topped off with a smaller circle in the very middle.
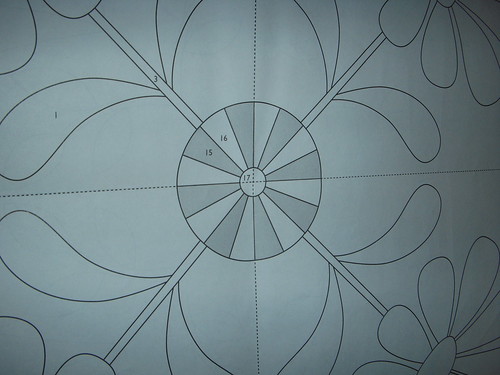
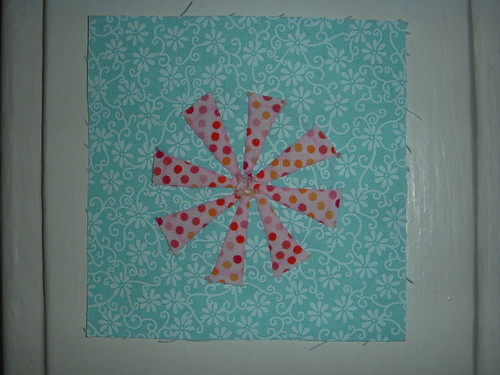
First, I traced the circle and the lines on the background fabric. I didn't cut it out; instead, I left it on a large square of fabric to make handling easier. Look closely and you can see the traced outline.
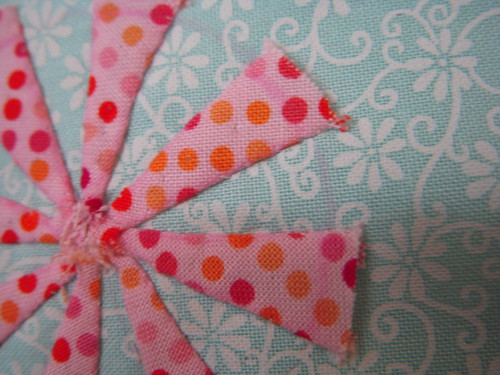
Next, I appliqued all the wedges to the background. It was a fairly straightforward process; I left a bit of overhang in the center and off the edge. Once the wedges were on, I appliqued the teeny tiny circle in the middle (not pictured here).
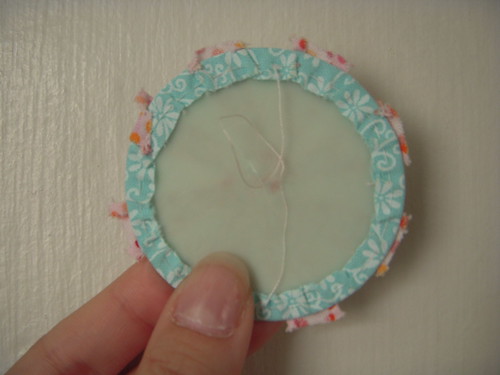
After applique, I trimmed the background fabric into a rough circle. Using a running stitch, I sewed around the outline and cinched it around a plastic template. Press, remove template, then press again. Voila! Circle!
Tuesday, July 12, 2011
Hand Dye Redux
Remember last time? I know I said I wanted to make sure I fully understand the process behind mixing dye baths and making colors before trying resist techniques, but I just couldn't resist getting in on Kristal's batik adventure. (See what I did there?)
Over the weekend, Kristal convinced me to let little loose and just experiment. I used my 50% off coupon to purchase 5 yards of prepared for dye Kona cotton-- it cost me less than $20, people!-- and helped make a huge mess on Kristal's patio.
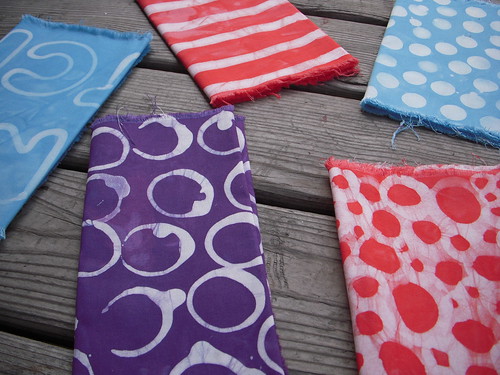
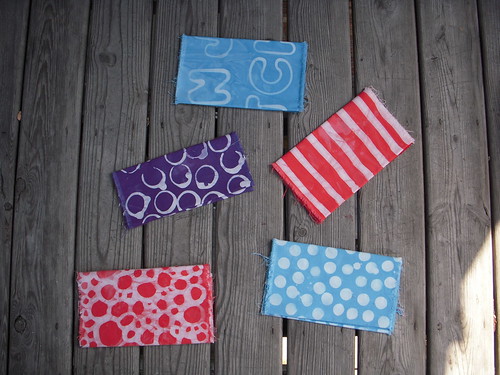
We used several tools to apply the wax, including cookie cutters, cardboard tubes, carrots, and paintbrushes of different types and sizes. First we waxed the fabric, then we dyed it. After completing the dye process, we followed Malka's directions for removing the wax (found in her fabulous book). I dyed five quarter-yard cuts of fabric.
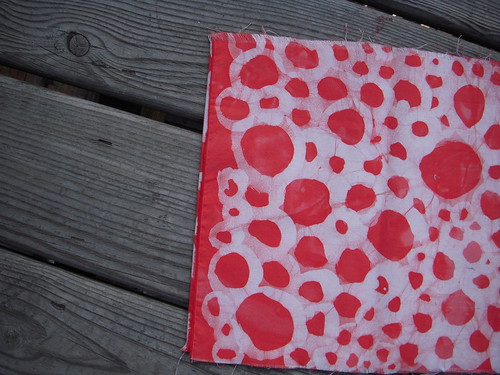
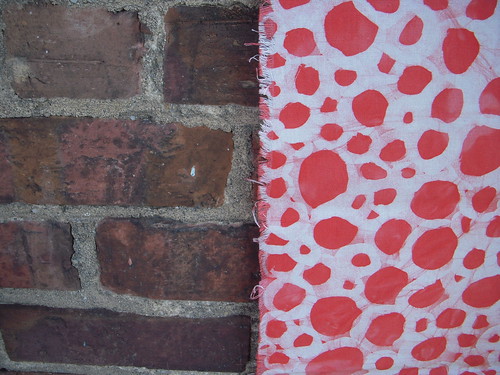
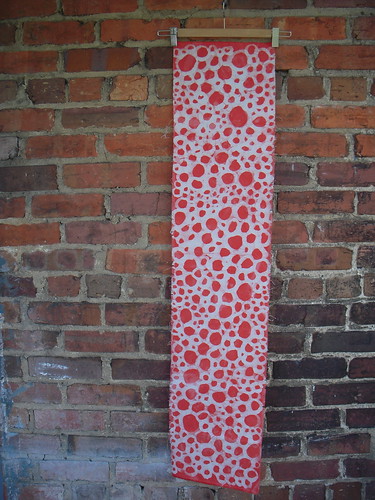
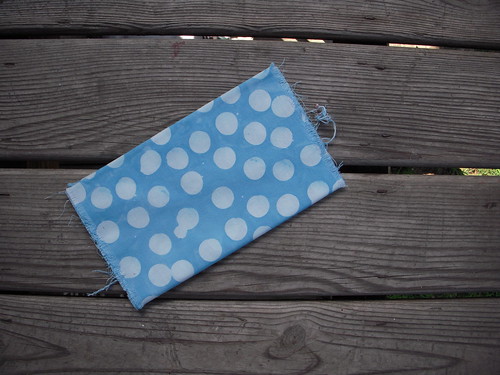
Everything did not go exactly perfect, which I struggle with. I still don't get it with the dye bath creation and color mixing, but I guess that's okay for now. Experimenting with wax and creating my own beautiful patterns on fabric was immensely satisfying, and so I guess all the knowledge and perfection can wait. I will get there eventually, and hopefully will have more successful experiments along the way.
Over the weekend, Kristal convinced me to let little loose and just experiment. I used my 50% off coupon to purchase 5 yards of prepared for dye Kona cotton-- it cost me less than $20, people!-- and helped make a huge mess on Kristal's patio.
We used several tools to apply the wax, including cookie cutters, cardboard tubes, carrots, and paintbrushes of different types and sizes. First we waxed the fabric, then we dyed it. After completing the dye process, we followed Malka's directions for removing the wax (found in her fabulous book). I dyed five quarter-yard cuts of fabric.
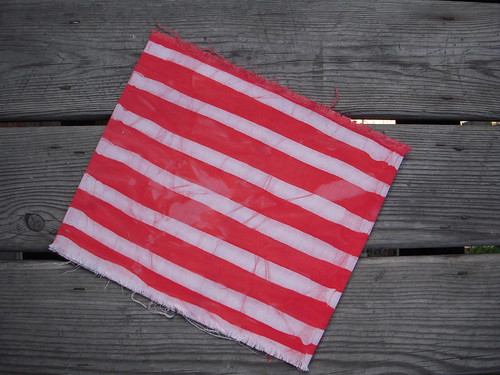
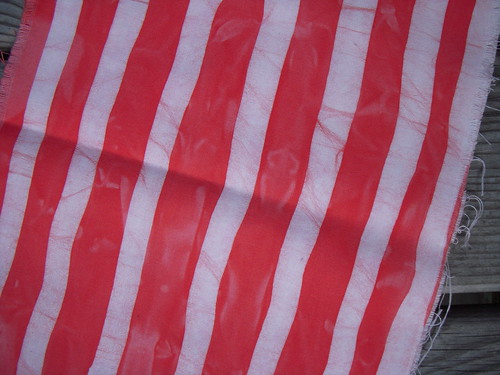
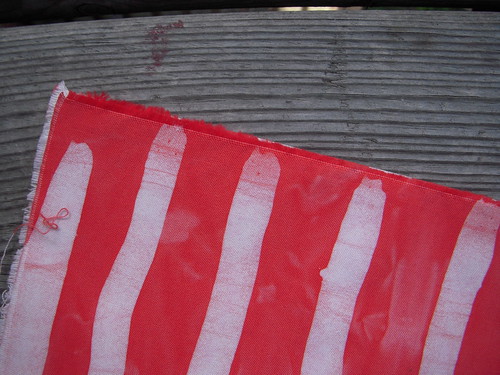
First, I created the stripes you see above. I used a large, bristled paintbrush to apply these streaks of wax. Everywhere that is white-- not really white, per se, but you get the idea-- is where I applied the wax. The bristled paintbrush holds wax well, and allowed me to apply a long streak of wax. You can see slightly where the wax overlapped. The selvedge shows where I began my streak.
The pattern and color on this piece of fabric closely resemble a big-top circus tent, therefore I have named this "print" Circus Stripes. Look closely at the photos to see the subtle variations that come with all hand-dyed fabrics. The gradations and lines that the dye left behind create a unique texture; no two pieces ever look the same.
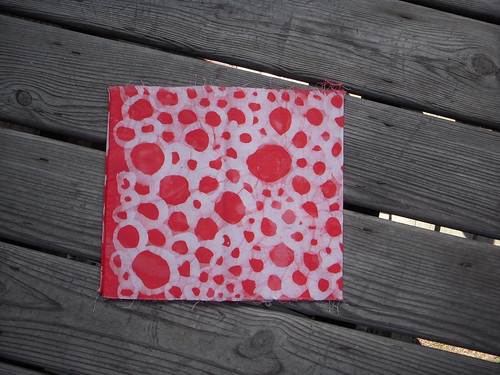
This pattern, Pebble Doodle, was created using a foam paintbrush. I painted the circles onto the fabric, one after another. It was quite time consuming, but the end result is pleasing. This piece of fabric particularly shows variations, especially where wax was not adequately applied to the fabric. Overall, this is my favorite piece; I am looking forward to recreating it in several different colors, though I know the final products will each be different.
I loved the look of Pebble Doodle against the bricks of my building; brick is a beautiful pattern all its own. Perhaps I will attempt to recreate that look and texture in my next experiment.
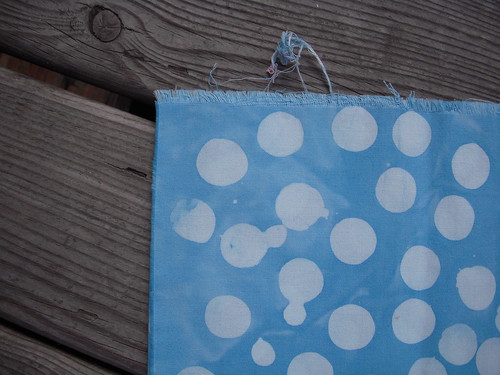
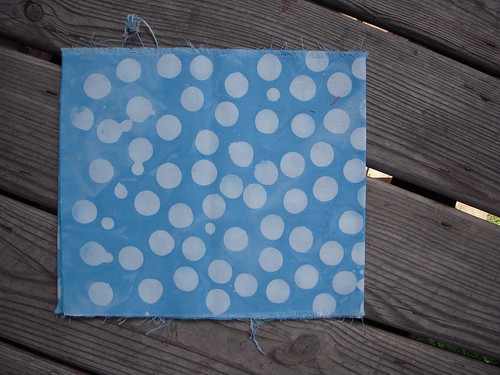
This fun dot was created using a carrot grown in Kristal's garden. After waxing about 3/4 of this piece the carrot was cooked and it began leaving orange streaks on the fabric! We used a powder called "azure" to create this color-- an appropriate name, considering the pieces dyed in that particular bath look like the exact color of a summer sky.
There are many drip dots on this piece, and although it was frustrating at the time, the end result is pleasing. I love the look of these irregular dots, and the small splashes of wax between add the character that you just don't get in printed fabric.
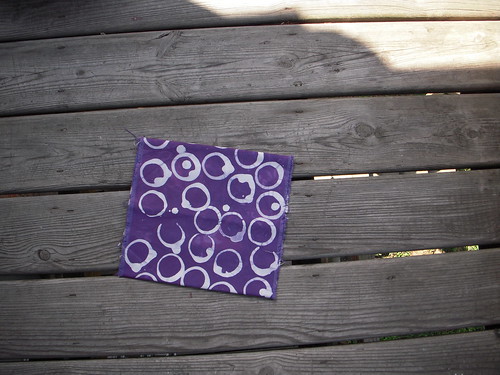
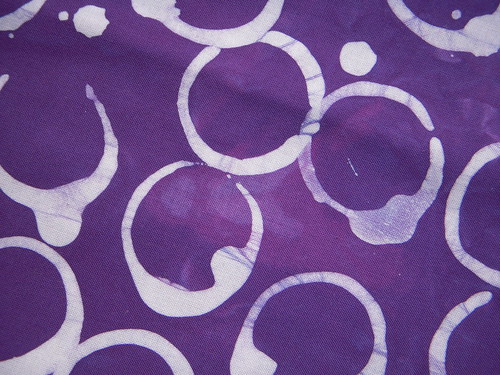
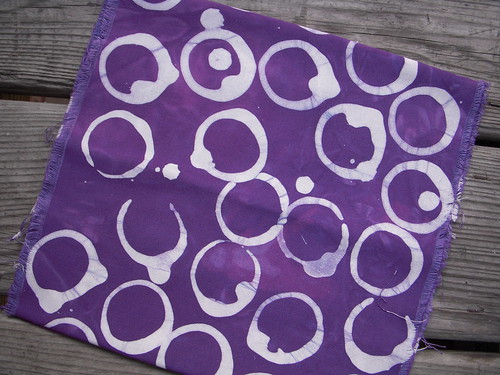
This piece gave me fits from beginning to end! I used a toilet tissue cardboard roll to stamp this pattern in an attempt to create a fabric spotted with rings. The wax foiled me, however, and dripped just about each and every time I attempted to stamp the fabric (perhaps this was due to my shaky hands).
Although it was frustrating at first, I embraced the lack of control and ended up with a beautiful piece of fabric. This color is produced using a powder called "reddish purple" and is probably my favorite color of all the dyes we used. The pattern-- called Coffee Rings-- is one that I will definitely reproduce again.
Everything did not go exactly perfect, which I struggle with. I still don't get it with the dye bath creation and color mixing, but I guess that's okay for now. Experimenting with wax and creating my own beautiful patterns on fabric was immensely satisfying, and so I guess all the knowledge and perfection can wait. I will get there eventually, and hopefully will have more successful experiments along the way.
Tuesday, July 5, 2011
Aunt Millie's Update 3
Here are the photos of my currently finished blocks, from beginning to end. See my previous post for hand applique tips.
I purchased the pattern and a kit for each block in this project. Additionally, I attended one group meeting (and paid the class fee) dedicated to this block of the month. Each kit was $19.99; I also purchased a finishing kit that includes materials for the appliqued border and patchwork sashing. Let's just say I've sunk several dollars into this project, and so no matter how tedious it becomes, I must finish it!
The first block took me about a year to finish. I did use the freezer paper method for this block, which probably took quite a bit of extra time. In retrospect, this method doesn't create any better results than plain ol' turning under.
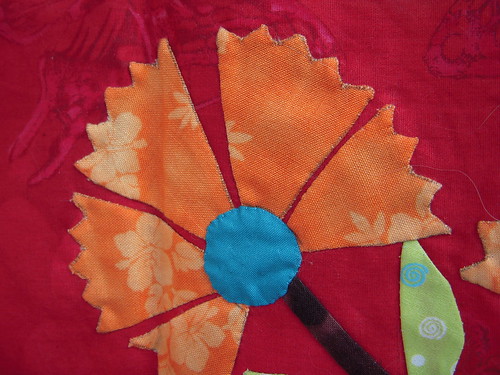
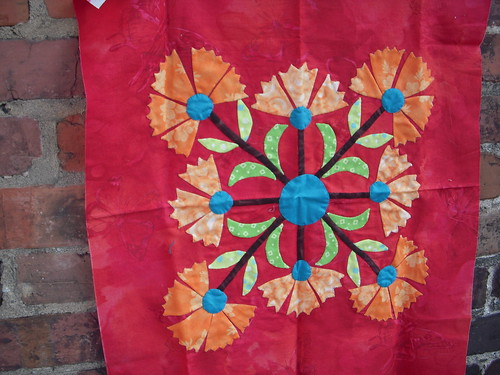
I've come quite far; when I look at that block, I want to redo it! All those points made me crazy, but of course it gave me quite a bit of practice in making nice points. Additionally, I attached some of the pieces out of order because I wasn't paying attention. I haven't fully decided if I will redo the block, but it is nice to compare this block to the others and to see how far my skills have come.
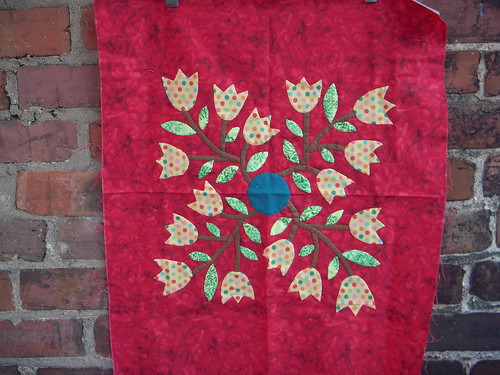
The second block was never photographed and today I only took one; perhaps that is a subconscious way of saying I don't really care for it? I do like the block, but only a little. Perhaps I will like it more after I redo the center medallion (more on that later). Can you see how much nicer this block is than the previous?
I finished this at the prodding of the ladies in my sewing group; they really helped reignite my excitement for this project. It's only because of them that I'm on my current finishing streak! Hopefully they'll keep me excited about it. (Do you like how I'm giving them all the responsibility for making sure this project is finished?)
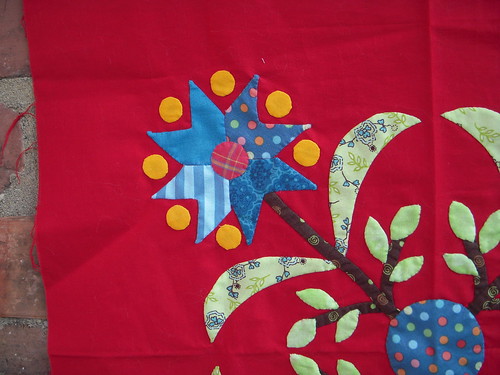
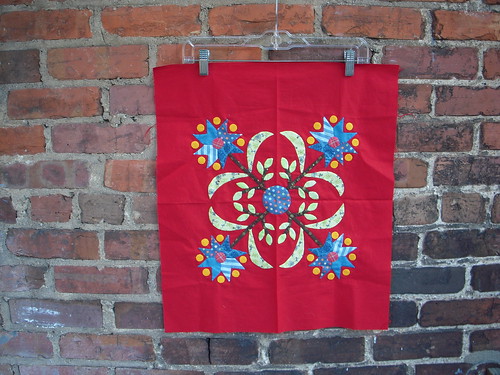
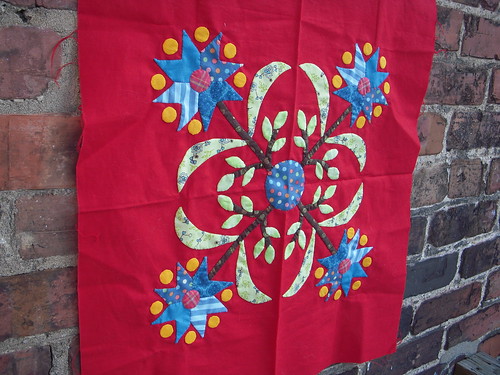
The project sat for quite a bit before I began the third block. This one is probably my favorite so far; I love the little yellow dots all around the flower heads and although I waffled about sewing them on (I was feeling burnt out), I'm glad I did.
I deviated from the original pattern to make things just a bit simpler for myself. Each flower head is supposed to be composed of eight petals; instead, I joined the petals together to create four, preserving the shape but removing the complication of perfectly lining up eight pieces. The overall design doesn't suffer-- it's still plenty cute!
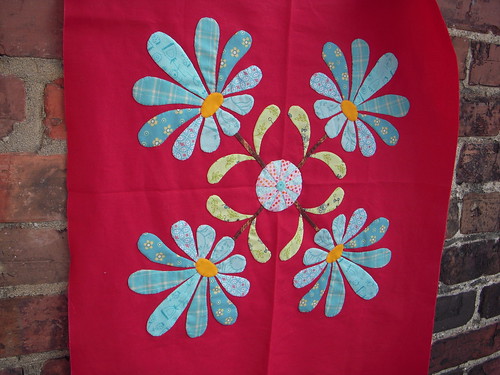
The fourth block was completed in only about a week's time. I did some of the sewing on my honeymoon-- in the airport on the way home, duh-- but finished it over the past weekend. The petals here are absolutely beautiful and they were fairly simple to applique because they are large and have gentle curves. I did have some difficulty when appliqueing the centers to the flowers-- I wasn't able to easily cover all raw edges-- but some pushing, stuffing, and stretching solved all that.
This block has the beautiful appliqued center medallion, unlike the others. Although the striped center medallion looks cute, it was not easy nor simple to make. (More on that later.) Despite its time-consuming difficulty, I will definitely be doing the other blocks to match. Perhaps not right away, but over the course of this project.
When comparing the first block to the most recent, the difference in skill level is obvious. My hands may turn arthritic and gnarled, but I will be an applique expert when I finish this project (someday). Overall, I am enjoying the applique experience. Perhaps later I won't say the same thing, but for today I am quite satisfied. I can't wait to finished the next block-- another simple one with large pieces and curves-- and see the fruit of my newfound skills.
Aunt Millie's Update 2
As we speak (type), I have finished exactly four-- count them!-- Aunt Millie's Garden blocks. The first I finished in summer 2010. The second was finished sometime between then and now; I'm unable to pin a timeframe on that one because I never even took pictures of it until now. The third and fourth were finished two weeks ago and last week, respectively.


The vinyl overlay method has been slow but much less tedious than using freezer paper or hard plastic templates. I don't follow this exact process, but at least that link gives you some idea of how I applique.
1. Less seam allowance is more. It's scary to trim a scant seam allowance when doing applique because one slip and you've wrecked your piece. Also, fraying is a concern. However, I've found that smooth curves are easier to create with less seam allowance, and there is also typically less fraying because you have less fabric you are trying to turn under.
2. Use the lightest marking pencil tint possible. Early on I used a black marking pencil. The line markings are just visible on the edges of those pieces, and it makes all the applique look very dirty around the edges. Currently, my tint of choice is pink. It is working out really well.
3. Pulling stitches too tightly makes them more visible. At times, when we tighten our hand stitches they disappear into the fabric. During the course of this project, I've noticed that sometimes tightening stitches makes them more visible, rather than less. Take care not to pull too tightly, otherwise you will get a ruffly edge around your piece, and the finished product will not be as smooth as you'd like.
4. Using a light box to trace is much more helpful than tracing on the window or using the television. I recently purchased one for myself. More details coming soon.
5. Trimming and snipping leads to crisper points. Points, of course, suck. Ugly points suck even more. It has been much easier to create satisfactory points by trimming and snipping at the vertices, then folding and tucking. I snip right up to the point, just a few threads from the fold line. Then, I tuck and fold the seam allowance in, trimming extra where necessary. If I had five hands I could take a video or pictures and show you.
6. Sew right to left. I am right-handed, and sewing right to left makes it much easier for me to turn and sew, turn and sew. Perhaps southpaws should sew in the opposite direction?
7. One thread does not fit all. There is not a universal color that will work with all fabrics-- if the thread does not disappear just right against the fabric, then the stitches are visible and that is crazy-making. And before you tell me to try that invisible thread stuff, know this: it is impossible to get a good knot with invisible thread.
The vinyl overlay method has been slow but much less tedious than using freezer paper or hard plastic templates. I don't follow this exact process, but at least that link gives you some idea of how I applique.
1. Less seam allowance is more. It's scary to trim a scant seam allowance when doing applique because one slip and you've wrecked your piece. Also, fraying is a concern. However, I've found that smooth curves are easier to create with less seam allowance, and there is also typically less fraying because you have less fabric you are trying to turn under.
2. Use the lightest marking pencil tint possible. Early on I used a black marking pencil. The line markings are just visible on the edges of those pieces, and it makes all the applique look very dirty around the edges. Currently, my tint of choice is pink. It is working out really well.
3. Pulling stitches too tightly makes them more visible. At times, when we tighten our hand stitches they disappear into the fabric. During the course of this project, I've noticed that sometimes tightening stitches makes them more visible, rather than less. Take care not to pull too tightly, otherwise you will get a ruffly edge around your piece, and the finished product will not be as smooth as you'd like.
4. Using a light box to trace is much more helpful than tracing on the window or using the television. I recently purchased one for myself. More details coming soon.
5. Trimming and snipping leads to crisper points. Points, of course, suck. Ugly points suck even more. It has been much easier to create satisfactory points by trimming and snipping at the vertices, then folding and tucking. I snip right up to the point, just a few threads from the fold line. Then, I tuck and fold the seam allowance in, trimming extra where necessary. If I had five hands I could take a video or pictures and show you.
6. Sew right to left. I am right-handed, and sewing right to left makes it much easier for me to turn and sew, turn and sew. Perhaps southpaws should sew in the opposite direction?
7. One thread does not fit all. There is not a universal color that will work with all fabrics-- if the thread does not disappear just right against the fabric, then the stitches are visible and that is crazy-making. And before you tell me to try that invisible thread stuff, know this: it is impossible to get a good knot with invisible thread.
Tuesday, June 21, 2011
DS Sweaters?
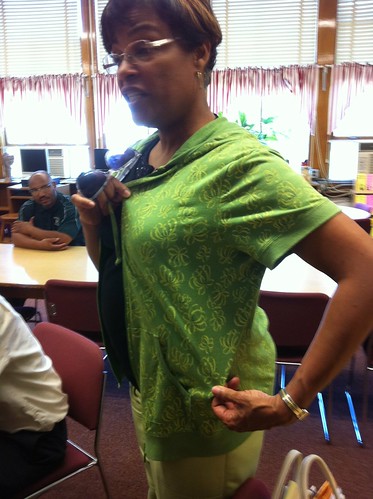
Doth mine eyes deceive me? Is that a sweater printed with a famous Denyse Schmidt print? Why, yes! Yes it is!
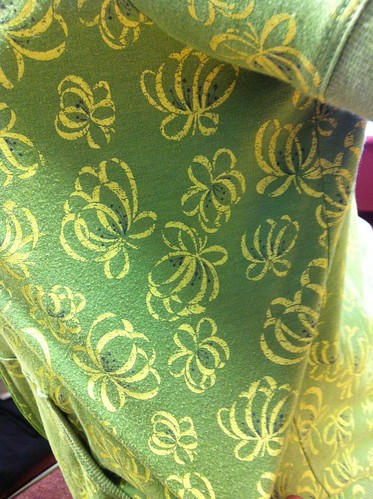
My coworker, Rosa, wore this sweater to work last week and I immediately honed in on the print, recognizing it almost immediately as a print from Denyse Schmidt's fabric collection, Katie Jump Rope. This sweater is factory-made out of some kind of thick jersey sweater material. Rosa stated that she bought it at JC Penney a few years ago.
I know that Bed Bath and Beyond sold some towels with hallmark Amy Butler prints, but I didn't realize Denyse Schmidt had licensed any of her prints to be used commercially.
Monday, June 20, 2011
Tornado Giveaway!
No, I am not giving away tornadoes. What a terrifying concept!
Jeanne over at The Learning Curve is hosting another tornado relief giveaway to raise money for the Red Cross of the Ozarks and provide relief for St. John's hospital in Joplin, Missouri.
The hospital endured extensive damage in the recent tornado storm, and Jeanne is challenging us to help them rebound. You can earn entries by blogging, tweeting, following, and (most importantly) donating and making. The hospital's newborn care unit needs receiving blankets, newborn hats, and baby gloves. Jeanne and her group have pledged to make 100 of each item!
Each donation, item made, blog post, and tweet will earn you an entry into this generous giveaway. The prizes available are an awesome haul-- gift certificates to fabric stores, yards of Sis Boom fabric, Tula Pink patterns, and more.
Just like before, I urge you to donate either time, money, crafts, or supplies. It could have been your community, you know...
Jeanne over at The Learning Curve is hosting another tornado relief giveaway to raise money for the Red Cross of the Ozarks and provide relief for St. John's hospital in Joplin, Missouri.
The hospital endured extensive damage in the recent tornado storm, and Jeanne is challenging us to help them rebound. You can earn entries by blogging, tweeting, following, and (most importantly) donating and making. The hospital's newborn care unit needs receiving blankets, newborn hats, and baby gloves. Jeanne and her group have pledged to make 100 of each item!
Each donation, item made, blog post, and tweet will earn you an entry into this generous giveaway. The prizes available are an awesome haul-- gift certificates to fabric stores, yards of Sis Boom fabric, Tula Pink patterns, and more.
Just like before, I urge you to donate either time, money, crafts, or supplies. It could have been your community, you know...
Saturday, June 11, 2011
Winner!
I'm happy to announce the winner of my Tornado Relief fundraiser giveaway is Jeanne. She received the quilt today and reported great surprise and happiness. Honestly, I was glad to send the quilt to such a kind woman; she deserved it!
Keep an eye on Jeanne's blog; she is launching another Tornado Relief giveaway pretty soon. There will be awesome prizes, included patterns from the illustrious Tula Pink!
Keep an eye on Jeanne's blog; she is launching another Tornado Relief giveaway pretty soon. There will be awesome prizes, included patterns from the illustrious Tula Pink!
Tuesday, June 7, 2011
Aunt Millie's Update
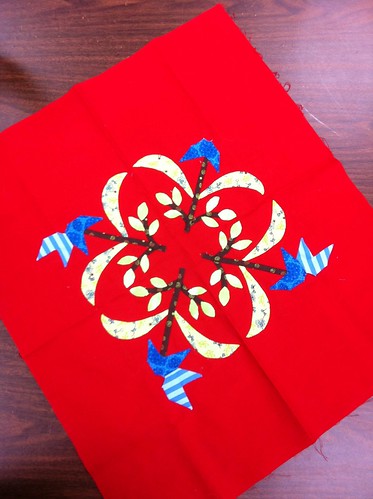
I spent some more time today working on my third Aunt Millie's Garden block. Surprisingly, I'm making some progress! Pardon the lack of contrast on the photo above, but that's my block. Since taking that pictures I have appliqued the second petal into that final quadrant.
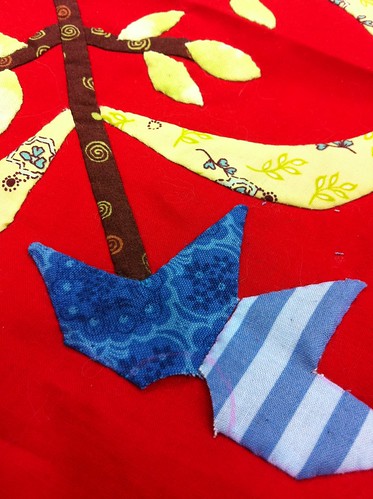
This is what my applique looks like close up. It looks much better from far away! Although I have appliqued what feels like a million pieces at this point, I am still not that great at it. My curves are not always smooth, and many times my points are still extremely bulky (and sometimes not that pointy).

This block calls for 8 petals in each flower head. I decided to combine the petals into four groups of two in order to make things simpler on myself. This way, I trace two petals as if they were one, and applique them in place. Because I am using different fabrics, I still have a scrappy look. But, because I have fewer pieces, I have less concern to perfectly line the petals together, and less worry that there will be too little or too much space around the petals.
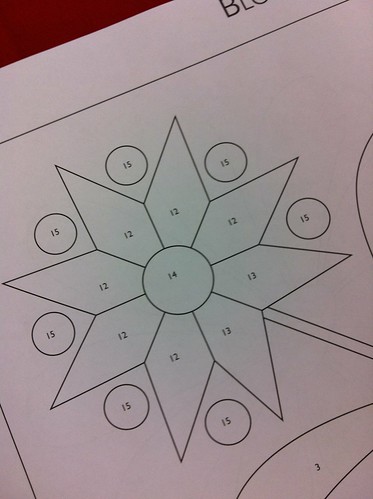
Is that cutting corners? Is cutting corners bad? Honestly, I think it looks just as cute, and I can't bear the thought of appliqueing 32 pointy little pieces after all those leaves. Not to mention all the circles I have to fuss with next...
Subscribe to:
Posts (Atom)